
Flat Roof Hail Damage: Spot, Document, and Act Fast

Flat roof hail damage shows up as circular indentations, star-shaped membrane fractures, punctures, displaced gravel or aggregate, and — most dangerously — hidden insulation compression that produces no visible surface sign at all. If a storm just rolled through, here are the three things to do right now:
- Stay off the roof alone. Wet membranes are slippery, and post-storm structural integrity is unknown. Ground-level observation and binoculars are your first move.
- Photograph everything immediately. Time-stamped photos from the ground, gutters, downspouts, HVAC fins, and any skylights create the evidence trail your insurer needs.
- Call a licensed roofing contractor. A professional inspection with core cuts and a written report is what converts a surface-level assessment into a documented, defensible insurance claim.
Pro Tip: Place a temporary tarp over any visible punctures or open seams before the next rain event. Keep every receipt — your policy’s duty-to-mitigate clause requires reasonable protective action, and those receipts support your claim.
Table of Contents
- What flat roof hail damage looks like by membrane type
- How to inspect a flat roof safely after a hail storm
- How hail size and roof assembly change your damage risk
- What to do immediately after you find suspected damage
- Repair or replace? How to make the right call on a hail-damaged flat roof
- What happens if you ignore hail damage on a flat roof
- When to call a licensed roofer and what to ask them
- How professionals document hidden damage for insurance claims
- Key Takeaways
- The part most property owners get wrong about flat roof hail claims
- Sladeroof’s post-hail inspection and claims support
- Sources and further reading
What flat roof hail damage looks like by membrane type
Not all flat roofs fail the same way. The membrane material determines where to look, what you’ll see, and whether the damage is cosmetic or structurally serious.
TPO (thermoplastic polyolefin)
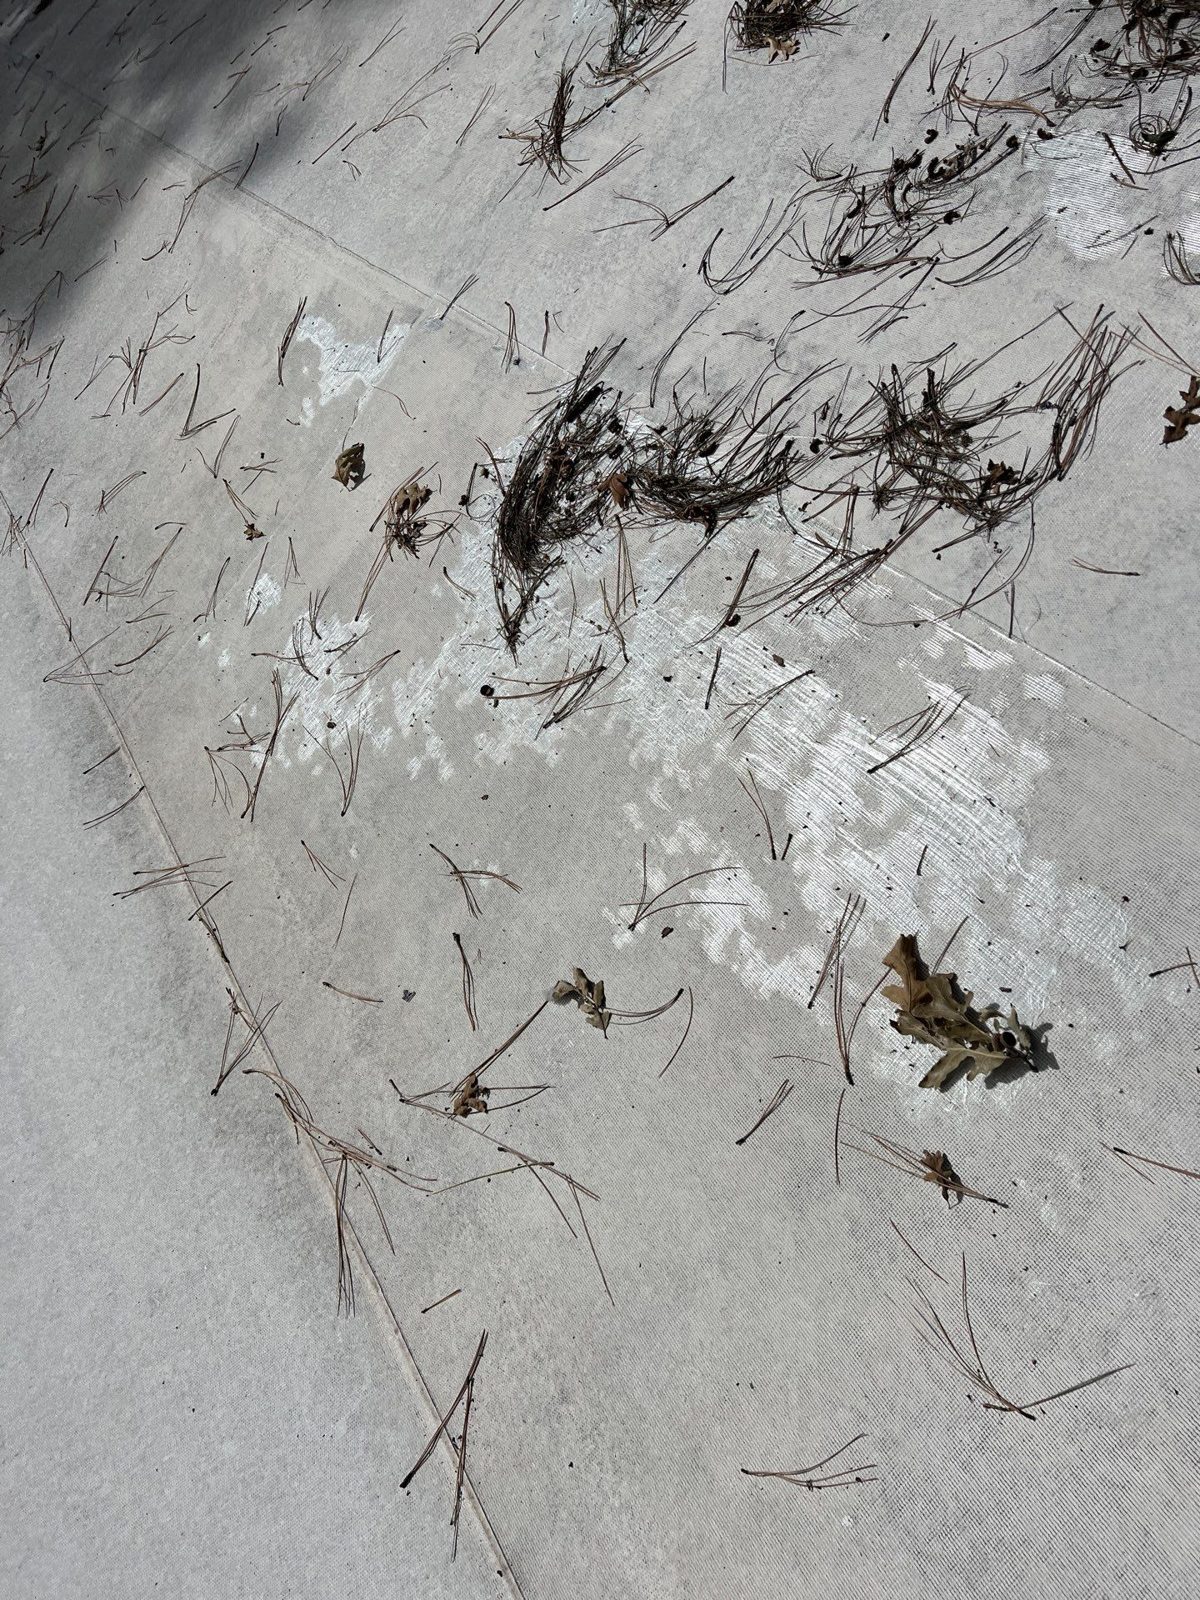
TPO is the most common single-ply membrane on commercial flat roofs today, and it shows hail damage clearly. Look for concentric circular fractures, star-shaped cracks radiating from impact centers, surface bruising, and exposed scrim (the reinforcing fabric beneath the top layer). Seam and termination failures are equally common after hail, even when the membrane field looks intact. Membrane thickness matters: field tests show that 60 mil TPO membranes have roughly 40% lower failure rates than 45 mil under equivalent hail impacts.
EPDM (ethylene propylene diene monomer)
EPDM is the trickiest membrane to assess after hail. The rubber absorbs impact energy well, so the surface often looks fine while the insulation beneath is crushed. Small circular indentations and subtle dark bruising are the visible tells, but immediate post-hail inspection typically captures only 35–45% of actual compromise on EPDM roofs. Pooling and delayed leaks commonly appear 60–90 days later. Pay close attention to splice edges, seam tapes, and termination details — those are where EPDM most often fails after a hail event, even when the membrane field looks undamaged.
PVC
PVC behaves similarly to TPO under hail: cracks, punctures, and surface fractures are visible. The additional risk is welded seam separation. Heat-welded seams can open under impact stress without obvious surface cracking, so probe seams carefully during any post-hail walkthrough.
Built-up roofing (BUR) and gravel-ballasted systems
BUR’s gravel layer disperses impact energy, which sounds like an advantage — and it is up to a point. The problem is that dislodged ballast conceals damage and complicates detection. Look for bare patches where aggregate has scattered, exposed felt layers, and rough or pitted surface areas. Displaced gravel is often the first thing visible from the ground.
Modified bitumen
Modified bitumen systems show granule loss, splits at seams or flashings, and punctures in smooth-surfaced versions. Seam and flashing areas are the highest-risk zones — check them first.
Pro Tip: Older membranes fail at smaller hail sizes than lab tests predict. UV aging, thermal cycling, and installation quality all reduce real-world resistance, so a 10-year-old roof needs closer scrutiny than a 2-year-old one with the same membrane.
How to inspect a flat roof safely after a hail storm
Speed matters, but so does safety. Follow this sequence.
- Start from the ground. Walk the building perimeter and photograph gutters, downspouts, HVAC fins, window sills, and any soft-metal flashing. Dents on these surfaces confirm hail size and density without setting foot on the roof.
- Use binoculars or a drone for the roof surface. A drone with a camera gives you overhead density shots and close-up angles without any fall risk. Binoculars from a ladder at the roof edge work for smaller buildings.
- Decide whether to climb. If you do go up, use the two-person rule (never alone), wear slip-resistant footwear, and use proper fall protection. Avoid walking on standing water, softened membrane, or any area where the surface feels spongy underfoot — that sponginess often signals saturated insulation.
- Document with a scale reference. Place a ruler, coin, or golf ball next to each impact point before photographing. This establishes hail size in the frame and makes the damage legible to an adjuster reviewing photos weeks later.
- Capture contextual damage. Photos of broken branches, dented vehicles, and damaged landscaping nearby corroborate the storm’s severity and support your claim timeline.
- Schedule a follow-up inspection 7–14 days out. A secondary inspection after 7–14 days frequently reveals moisture pooling and membrane dimpling that an immediate survey misses entirely.
Safety checklist before any rooftop access:
- No solo rooftop walks, ever
- Check for standing water or slipped membrane sections before stepping
- Avoid the roof entirely if structural damage is suspected
- Confirm the ladder is secured and a second person is present
Pro Tip: Pull the local weather service storm report for the date of the event and save it as a PDF. Time-stamped radar data and hail-size reports from the National Weather Service are among the most persuasive documents you can attach to an insurance claim.
How hail size and roof assembly change your damage risk
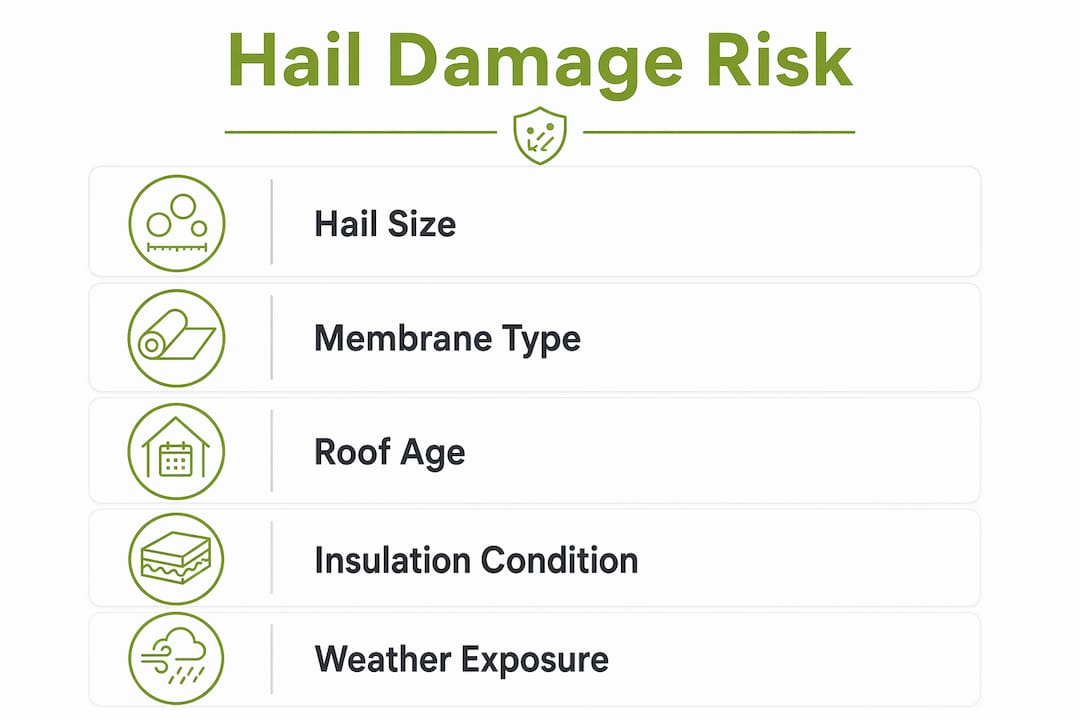
Hail diameter is the starting point, but it’s not the whole story.
The two dominant testing standards in the U.S. are UL 2218 and FM 4470. UL 2218 uses steel balls dropped from set heights to simulate hail; Class 4 is the highest rating and corresponds to a 2-inch steel ball. FM 4470 uses similar class ratings but tests full roof assemblies rather than membrane samples alone. Both standards assume ideal installation conditions and new materials.
| Hail diameter | General risk level | Notes |
|---|---|---|
| Under 1 inch | Low | Cosmetic risk on most membranes |
| — | Moderate | Granule loss on modified bitumen; BUR aggregate displacement |
| — | High | TPO fracture threshold in many field tests |
| — | Very high | Puncture risk on aged TPO and PVC; EPDM insulation compression likely |
| — | Severe | All membrane types at risk; EPDM lab tests show resistance up to 3-inch impacts in controlled conditions, but field-aged membranes perform below lab predictions |
The gap between lab ratings and field outcomes is real. FM 4470 class ratings assume ideal conditions; aged membranes fail at smaller hail sizes than those tests predict. A 45-mil TPO membrane that passed Class 3 testing when new may behave more like an unrated membrane after a decade of UV exposure and thermal cycling. Cover boards add meaningful impact resistance by distributing load before it reaches the membrane, and thicker insulation boards reduce the risk of compression damage.
What to do immediately after you find suspected damage
Act in this order to protect both the building and the insurance claim.
- Secure the site. If there are visible punctures or open seams, apply an emergency tarp or approved patch material. Save every receipt.
- Photograph and mark impact zones. Use spray chalk or removable tape to mark clusters of impact points on the roof surface. Overhead density shots showing the distribution of marks are more persuasive to adjusters than individual close-ups alone.
- Collect the weather report. Download the National Weather Service storm data for your location and date. Note hail size, storm duration, and any tornado or severe thunderstorm warnings.
- Log time-stamped notes. Write down when you discovered the damage, what you observed, and what temporary actions you took. A dated email to yourself or your property management system works fine.
- Document secondary damage. Photograph dented HVAC equipment, damaged skylights, bent gutters, and any interior signs of water infiltration — ceiling stains, wet insulation, or pooling on interior surfaces.
- Notify your insurer. Most commercial policies require prompt notification. Call to open a claim and ask about their inspection timeline. Then call a licensed roofing contractor to schedule an independent inspection before the adjuster visit.
Documentation checklist:
- Overhead density shots showing impact distribution
- Close-ups with a scale reference (ruler or coin)
- Roof-edge and flashing photos
- Interior infiltration signs
- Secondary damage (HVAC, gutters, skylights)
- Time-stamped weather report
Pro Tip: Call a roofing contractor before the adjuster arrives, not after. An independent documented roof inspection gives you a professional baseline that prevents a surface-only adjuster report from closing your claim prematurely.
Repair or replace? How to make the right call on a hail-damaged flat roof
Patch repairs cost substantially less upfront. Practitioner data shows patch repairs often cost 60–70% less than full membrane replacement for comparable sections, which is exactly why carriers tend to prefer them. The problem is that distributed hail damage creates dozens of future failure points that spot patches don’t address.
| Factor | Patch/spot repair | Full membrane replacement |
|---|---|---|
| Scope of damage | Isolated (1–5 impact points) | Distributed (20+ points, widespread scrim exposure) |
| Core-cut findings | Insulation intact | Insulation compression confirmed |
| Seam condition | Seams undamaged | Seam or termination failures present |
| Long-term reliability | Higher future failure risk | Restores full system integrity |
| Insurance settlement | Carrier-preferred for minor damage | Justified by documented structural compromise |
Full replacement is the right call when core cuts confirm insulation compression, when seam or termination failures are widespread, or when impact points are distributed across a large area rather than concentrated in one zone. A repair vs. replacement decision grounded in documented core-cut findings is far more defensible to a carrier than a contractor’s verbal recommendation alone.
What happens if you ignore hail damage on a flat roof
The timeline is predictable, and none of it is cheap.
- Weeks 1–8: Compressed insulation absorbs moisture. No visible leak yet. Energy costs begin rising as the thermal barrier degrades.
- Months 2–4: Moisture migrates to the roof deck. Delayed leaks appear, often far from the original impact zone. Interior ceiling stains emerge.
- Months 4–12: Mold growth begins in saturated insulation and decking. Structural wood or metal deck components start to deteriorate.
- Year 1+: Full deck replacement may be required, multiplying repair costs several times over. Tenant disruption, equipment corrosion from drips, and warranty voidance compound the financial damage.
The insurance angle is equally serious. Carriers can invoke cosmetic-exclusion defenses when damage goes undocumented. A claim filed months after a storm, with no time-stamped photos and no weather report, is far easier to deny or underpay. Water damage in commercial roofs that traces back to ignored hail damage often falls outside coverage entirely once the delay becomes apparent.
Sprayed polyurethane foam (SPUF) roofs face a particular detection problem: fractures from hail can be nearly invisible on the surface but allow water infiltration that spreads laterally through the foam before any interior sign appears. By the time a leak is visible inside, the affected area is often far larger than the original impact zone.
When to call a licensed roofer and what to ask them
Some situations don’t need deliberation. Call a professional immediately if you observe any of the following:
- Visible punctures or tears in the membrane
- More than 20 impact points in any 100-square-foot area
- Seam or flashing damage
- Standing water that wasn’t present before the storm
- Any interior signs of water infiltration
When you call, ask these questions before scheduling:
- Are you licensed and insured in this state? Can you provide proof before the inspection?
- How much experience do you have with flat-roof systems specifically (TPO, EPDM, BUR)?
- Do you perform core cuts and provide a written, time-stamped inspection report?
- Will your report reference UL 2218 or FM 4470 standards where applicable?
- What warranty do you offer on repairs or replacement work?
Red flags: A contractor who gives a verbal quote without climbing the roof, refuses to provide written documentation, or discourages core sampling when distributed damage is present is not the right contractor for an insurance-related claim.
Pro Tip: Ask specifically whether the contractor has experience working with insurance adjusters on flat-roof claims. Understanding how roofing insurance claims work is a distinct skill from knowing how to install a membrane — you want both.
How professionals document hidden damage for insurance claims
The strongest insurance claims combine three things: core cuts, time-stamped multi-angle photography, and targeted moisture scans. Surface photos alone rarely move a carrier from a patch settlement to a full replacement.
Core cuts are the definitive test for insulation compression. A contractor removes a small section of the membrane and insulation assembly to inspect the substrate directly. Crushed or saturated insulation that isn’t visible from the surface becomes undeniable physical evidence. Adjusters and underwriters expect to see core-cut results referenced in any claim arguing for full replacement.
The standard professional claim-building sequence: immediate inspection to document surface impacts, core cuts to confirm substrate damage, and a follow-up inspection 7–14 days later to capture pooling and membrane distortion that only appears after secondary weather exposure. Claims built on all three elements consistently outperform surface-only reports in settlement negotiations.
Moisture scans using infrared thermography or nuclear moisture meters add another layer of proof. These tools identify wet insulation zones that look dry on the surface, mapping the true extent of water infiltration. When combined with core-cut findings, they make it very difficult for a carrier to argue that damage is cosmetic.
The 7–14 day follow-up inspection is standard field practice for a reason. Insulation compression creates low spots that collect water only after the next rain event. An immediate inspection documents the impact pattern; the follow-up documents the consequence. Together, they tell a complete story.
Pro Tip: Maintain chain-of-custody for core samples and photos. Label each sample with the roof location (use a marked diagram), the date and time, and the inspector’s name. Photos should be taken with a device that embeds GPS and timestamp metadata — never edit or crop originals before submitting to the carrier.
Key Takeaways
Flat roof hail damage is often hidden beneath an intact membrane surface, making professional core cuts and a 7–14 day follow-up inspection the two steps that most reliably convert a surface report into a full replacement claim.
| Point | Details |
|---|---|
| Document immediately | Time-stamped photos, weather reports, and marked impact zones are the foundation of any successful claim. |
| Schedule two inspections | An immediate survey plus a 7–14 day follow-up captures pooling and insulation compression that the first visit misses. |
| Core cuts prove hidden damage | Insulation compression confirmed by core cuts is the strongest evidence for a replacement settlement over a patch. |
| Membrane type changes what you look for | TPO fractures visibly; EPDM hides damage in the insulation; BUR scatters aggregate — know your system. |
| Sladeroof handles the full process | Sladeroof provides inspections, core sampling, emergency repairs, and insurance-claim assistance across Idaho, Arizona, and Wyoming. |
The part most property owners get wrong about flat roof hail claims
The conventional wisdom says: wait for the adjuster, then decide what to do. That sequence costs property owners money every time.
Adjusters work fast and often work alone. A surface-only inspection on a TPO or EPDM roof will miss insulation compression in the majority of cases — not because adjusters are incompetent, but because the damage genuinely isn’t visible without core cuts. By the time a carrier closes a claim as “cosmetic only,” reopening it requires new evidence that is much harder to produce months later.
The property owners who get full replacement settlements are the ones who had an independent contractor on the roof before the adjuster arrived, with a written report, core-cut findings, and a moisture scan in hand. That documentation shifts the entire negotiation. A carrier looking at a surface-only report has every incentive to offer patches. A carrier looking at core-cut evidence of insulation compression and a moisture map showing wet zones across 30% of the roof has a much harder case for denying replacement.
The other thing people underestimate is the 7–14 day follow-up. Most property managers schedule one inspection and consider the job done. The follow-up is where the real claim-building happens — pooling, dimpling, and moisture migration that weren’t visible on day one become clear after the next rain. That second visit is often the difference between a patch settlement and a full replacement.
Sladeroof’s post-hail inspection and claims support
After a hail event, the clock starts running on your claim and your building’s integrity at the same time.

Sladeroof brings over 20 years of combined roofing and insurance expertise to every post-hail inspection across Idaho, Arizona, and Wyoming. The team performs same-day or next-day roof inspections, core cuts, infrared moisture scans, emergency tarping and patching, and full insurance-claim documentation — the complete sequence this article describes. Every inspection produces a written, time-stamped report with multi-angle photography and core-cut findings formatted for adjuster review.
If you manage a commercial flat roof and a storm just hit, the right move is a commercial roofing inspection before the adjuster arrives. Sladeroof’s team will document what’s actually there, not just what’s visible from the surface. Request your inspection at sladeroof.com.
Sources and further reading
The following sources informed the technical claims and testing data in this article. Attach time-stamped National Weather Service storm reports and local hail-size data to any insurance claim — adjusters treat official weather records as primary evidence.
- EPDM Roofing Association: The Truth About Hail and EPDM — ERA’s field and lab findings on EPDM hail resistance, including RICOWI inspection data from the 2016 Texas hailstorm (hail up to 4 inches; no punctures or fractures documented on inspected EPDM membranes).
- Hail Impact Testing of EPDM Roof Assemblies (ERA proceedings) — Controlled lab testing showing field-aged EPDM targets surviving 3-inch test sphere impacts; useful context for understanding EPDM’s insulation-compression risk versus membrane-puncture risk.
- Comparative Performance of EPDM Against Hail Damage (ERA white paper) — Cross-membrane comparison covering BUR, modified bitumen, and SPUF failure modes alongside EPDM performance data.
- Hail Impact Performance of Thermoplastic Single-Ply Membranes (ASCE) — Peer-reviewed forensic study of TPO and PVC membrane performance using real-world Texas hail event data; covers puncture and fracture patterns across multiple variables.
For UL 2218 and FM 4470 test methodology details, consult UL’s published standard directly or request FM Approvals documentation through your roofing contractor. These standards define the class ratings your carrier may reference when evaluating your claim.
Recommended
Ready for a real answer on your roof?
Slade Roofing pairs licensed insurance agents with licensed roofers. Get your free inspection in about 30 seconds.
Get My Free Inspection →