
Roof Flashing Types: What Homeowners Need to Know
Roof flashing is the bent metal or membrane installed at every roof transition to direct water “down and out,” away from the building instead of into it. The most common residential roof flashing types are drip edge, valley flashing, step flashing, counter flashing, chimney flashing (a base, step, and counter combination), vent pipe flashing, kickout flashing, and headwall or apron flashing. Once you know what each one looks like and where it belongs, you can walk your own roofline and spot trouble before it becomes a ceiling stain.
This guide breaks down where each type sits, what it stops, and when a problem is a five-minute fix versus a job for a licensed roofer.
- Drip edge (roof eaves and rakes)
- Valley flashing (where two roof planes meet)
- Step flashing (roof-to-sidewall junctions)
- Counter flashing (paired with step flashing at walls and chimneys)
- Chimney flashing system (apron, step, counter, and often a cricket)
- Vent pipe flashing, or pipe boots (plumbing stacks)
- Kickout flashing (where a roof edge meets a sidewall)
- Headwall/apron flashing (above windows, doors, and roof-to-wall intersections)
Key Takeaways
Correctly installed flashing, layered so every seam sheds water down and out, prevents the majority of roof leaks that start at transitions rather than open shingle surfaces.
| Point | Details |
|---|---|
| Know the eight core types | Drip edge, valley, step, counter, chimney, vent pipe, kickout, and headwall/apron flashing cover nearly every transition on a residential roof. |
| Transitions cause most leaks | About 80% of roof leaks start at flashing junctions, not the open shingle field, so inspect there first. |
| Match materials to climate | Copper and stainless resist corrosion best; coastal and snow-heavy homes should avoid plain galvanized where possible. |
| Kickout flashing is often missing | Older homes frequently lack it at roof-to-sidewall terminations, a detail now required under IRC R903.2. |
| Complex systems need a pro | Sladeroof handles chimney flashing, reglet work, and full replacement, backed by a 25-year leak warranty and 50-year product warranty. |
Table of Contents
- Why Roof Flashing Types Matter More Than the Shingles
- How Roof Flashing Types Are Named and Organized
- The Main Types of Roof Flashing and Where They Go
- Which Flashing Materials Last the Longest?
- How to Spot Flashing Problems
- Getting Roof Flashing Installation Right
- Maintenance That Actually Extends Flashing Life
- When to Call a Professional Roofer
- What Most Homeowners Get Wrong About Flashing
- Get Flashing Problems Fixed Before They Become Claims
- Frequently Asked Questions
- Sources
Why Roof Flashing Types Matter More Than the Shingles
Flashing prevents water intrusion at every seam, corner, and penetration on your roof, and it’s the leading cause of leaks when it’s missing, undersized, or installed wrong. Shingles handle open expanses fine on their own. It’s the transitions, valleys, walls, chimneys, and pipes, where two surfaces meet, that need a dedicated water-diverting layer.
Roughly 80% of roof leaks start at flashing transitions rather than out in the open field of shingles. That single figure explains why a roof can look fine from the driveway and still be actively leaking behind a chimney or into a sidewall.
The International Residential Code addresses this directly.
Flashing is required at wall and roof intersections, and at any point where the roof plane meets a vertical surface or penetration, per IRC R903.2. The code also calls for kickout flashing wherever a roof edge terminates at a sidewall, a detail many older homes never got.
Skip or botch that flashing, and here’s what follows:
- Slow leaks that rot roof decking and wall framing long before you see a stain
- Mold growth inside wall cavities, often undetected for years
- Ice dam vulnerability in cold climates when water backs up under shingles
- Insurance complications, since many policies treat long-term flashing neglect differently than sudden storm damage
How Roof Flashing Types Are Named and Organized
Most flashing names describe either where the piece sits or what job it does. Drip edge and valley flashing are named for location. Counter flashing is named for its function, it counters, or caps, the step flashing beneath it.
- By location: drip edge (eaves/rakes), valley flashing (roof valleys), headwall flashing (above openings)
- By function: counter flashing (caps and seals), kickout flashing (diverts water sideways into a gutter)
- By assembly: chimney flashing (a multi-part system combining several individual pieces)
If you’re inspecting your own roof right now, skip ahead to the inspection checklist. If you’re comparing materials before a repair, head to the materials section below.
The Main Types of Roof Flashing and Where They Go
Drip edge: the first line of defense at the roof’s edge
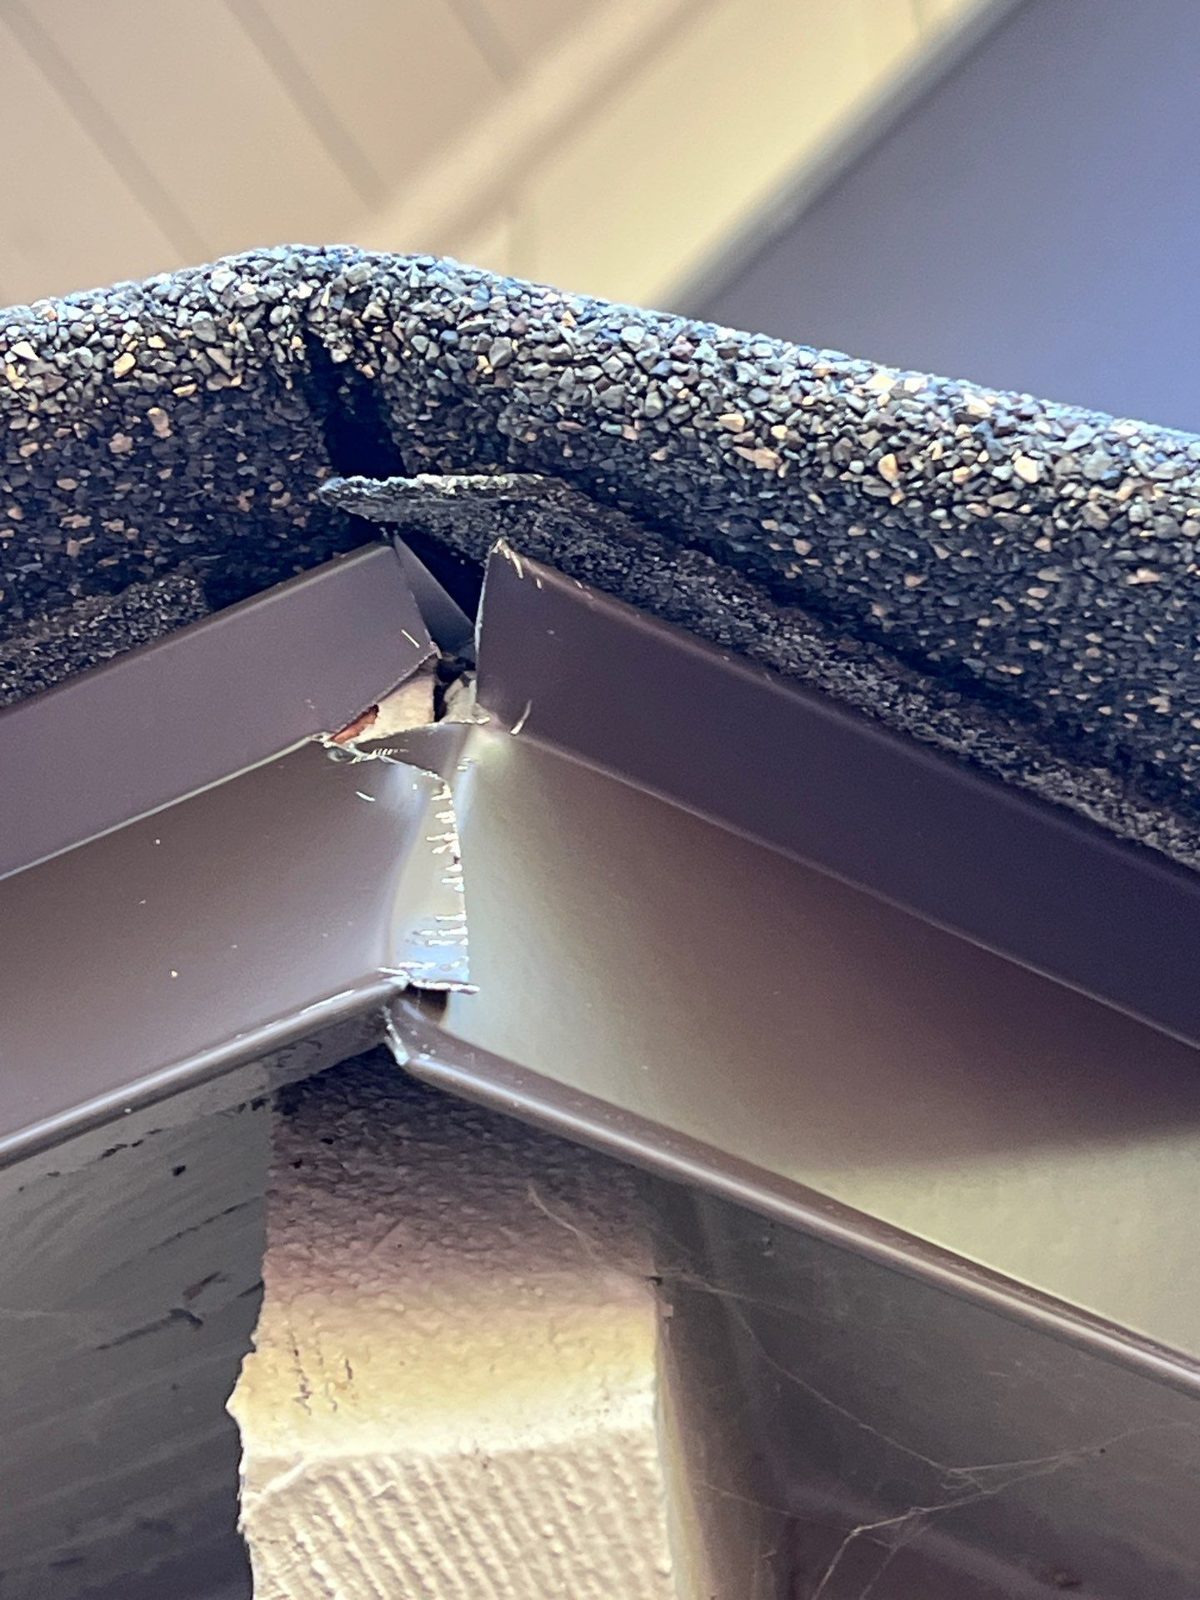
Drip edge runs along eaves and rakes, and its job is simple: it stops water from wicking back under the shingles and into the fascia board. It’s fully visible from the ground, a thin metal lip peeking out past the shingle line, so checking it doesn’t require a ladder. Standard material is 26-gauge galvanized steel or 0.025-inch aluminum. Rust spots or a section pulling away from the fascia are easy DIY fixes with a few roofing nails; widespread corrosion means a professional replacement.
Valley flashing: managing the heaviest water flow on the roof
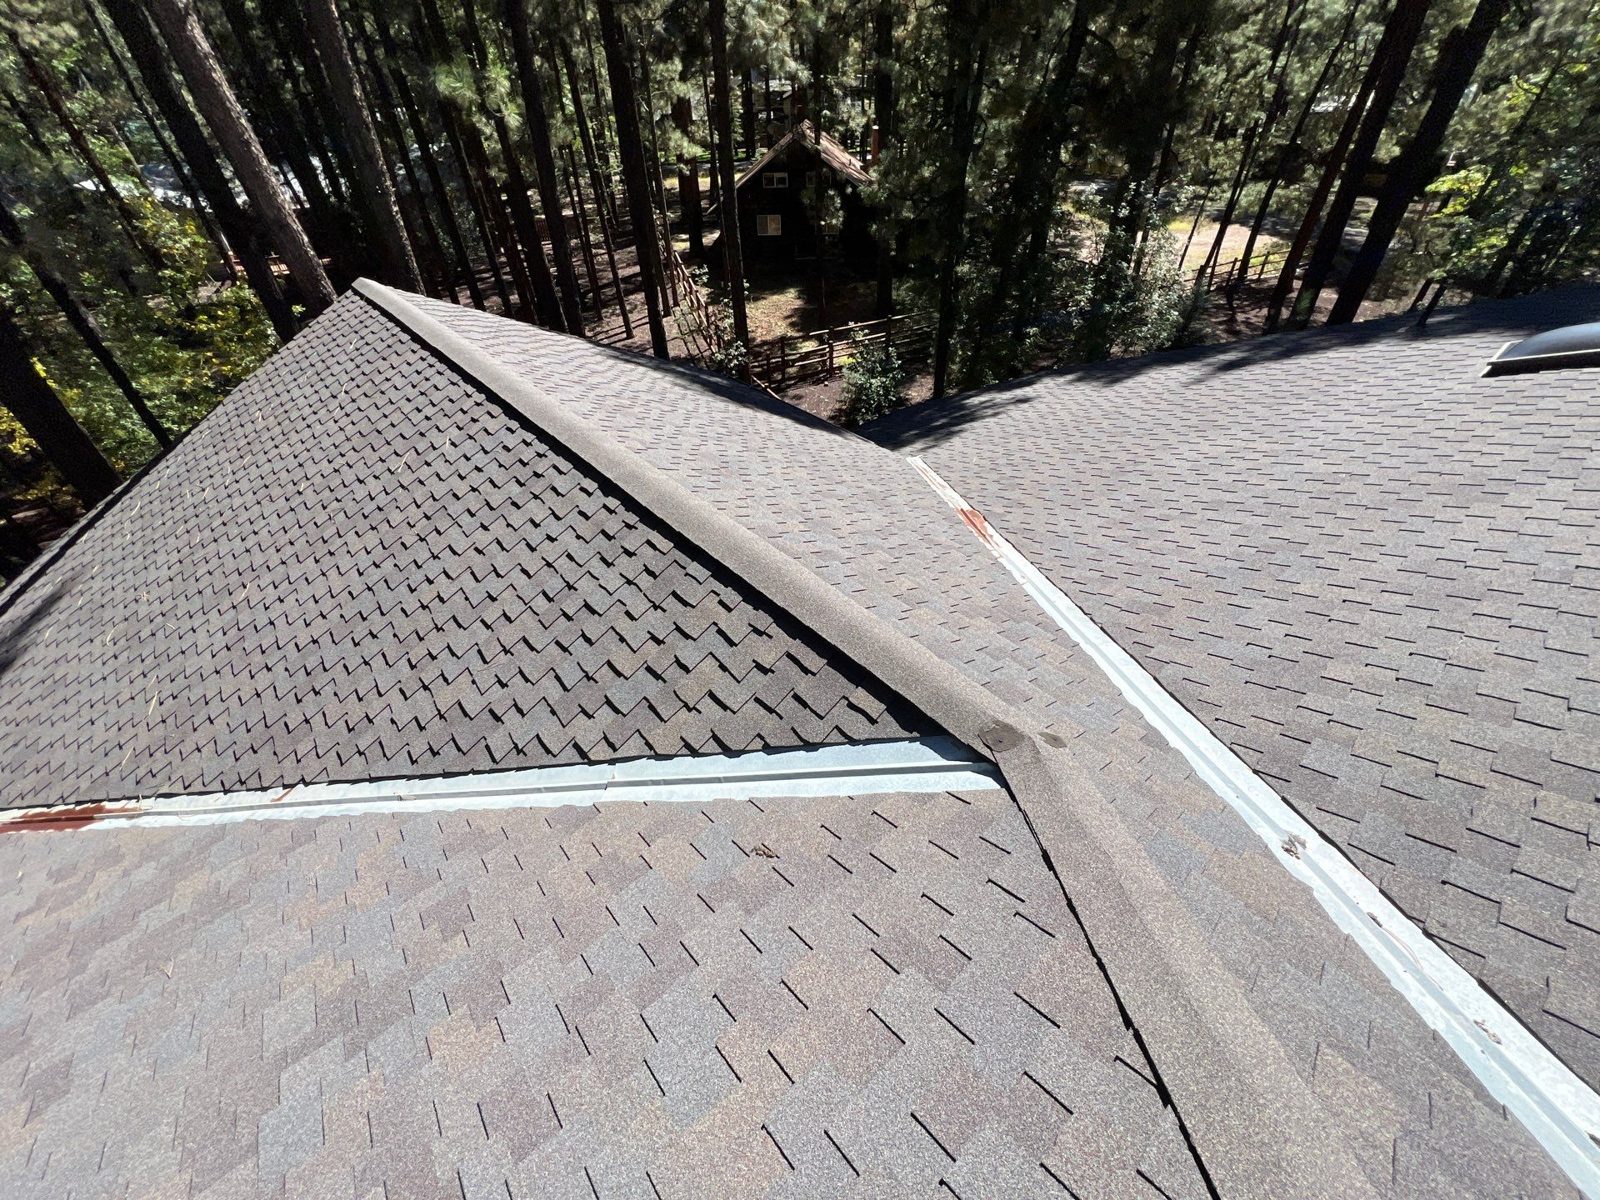
Where two roof planes meet at an angle, water concentrates fast, and valley areas are high-risk zones for concentrated runoff. Open valleys expose the metal channel and perform best long term. Closed and woven valleys hide the metal under shingles for a cleaner look but demand more precise installation. In heavy snow or rain climates, open metal valleys are the safer long-term bet.
Step flashing: the roof-to-wall workhorse
Step flashing consists of small, L-shaped metal pieces installed one at a time with each course of shingles wherever a roof plane meets a vertical wall, like a dormer or an add-on. Each piece overlaps the one below it, layered so water always moves down and out. You can usually see the top edges peeking from under siding, but confirming correct installation under the shingles requires a roofer.
Counter flashing: the cap that finishes the job
Counter flashing works as a pair with step flashing. It’s mounted into the wall (ideally cut into a masonry reglet) and folds down over the step flashing to shed water completely away from the seam. Reglet-mounted counter flashing on masonry lasts significantly longer and needs far less sealant maintenance than surface-mounted counter flashing, which is a common retrofit shortcut on stucco or siding. If you see a bead of caulk doing all the work with no metal underneath, that’s a red flag.
Chimney flashing: the most complex system on your roof
Chimney flashing isn’t one piece. It’s a system combining apron flashing, step flashing, counter flashing, and often a cricket on the uphill side to divert water around the masonry. Given the number of parts and angles involved, this is the area most prone to failure and the one homeowners should least attempt to DIY.
Vent pipe flashing (pipe boots): rubber’s weak point
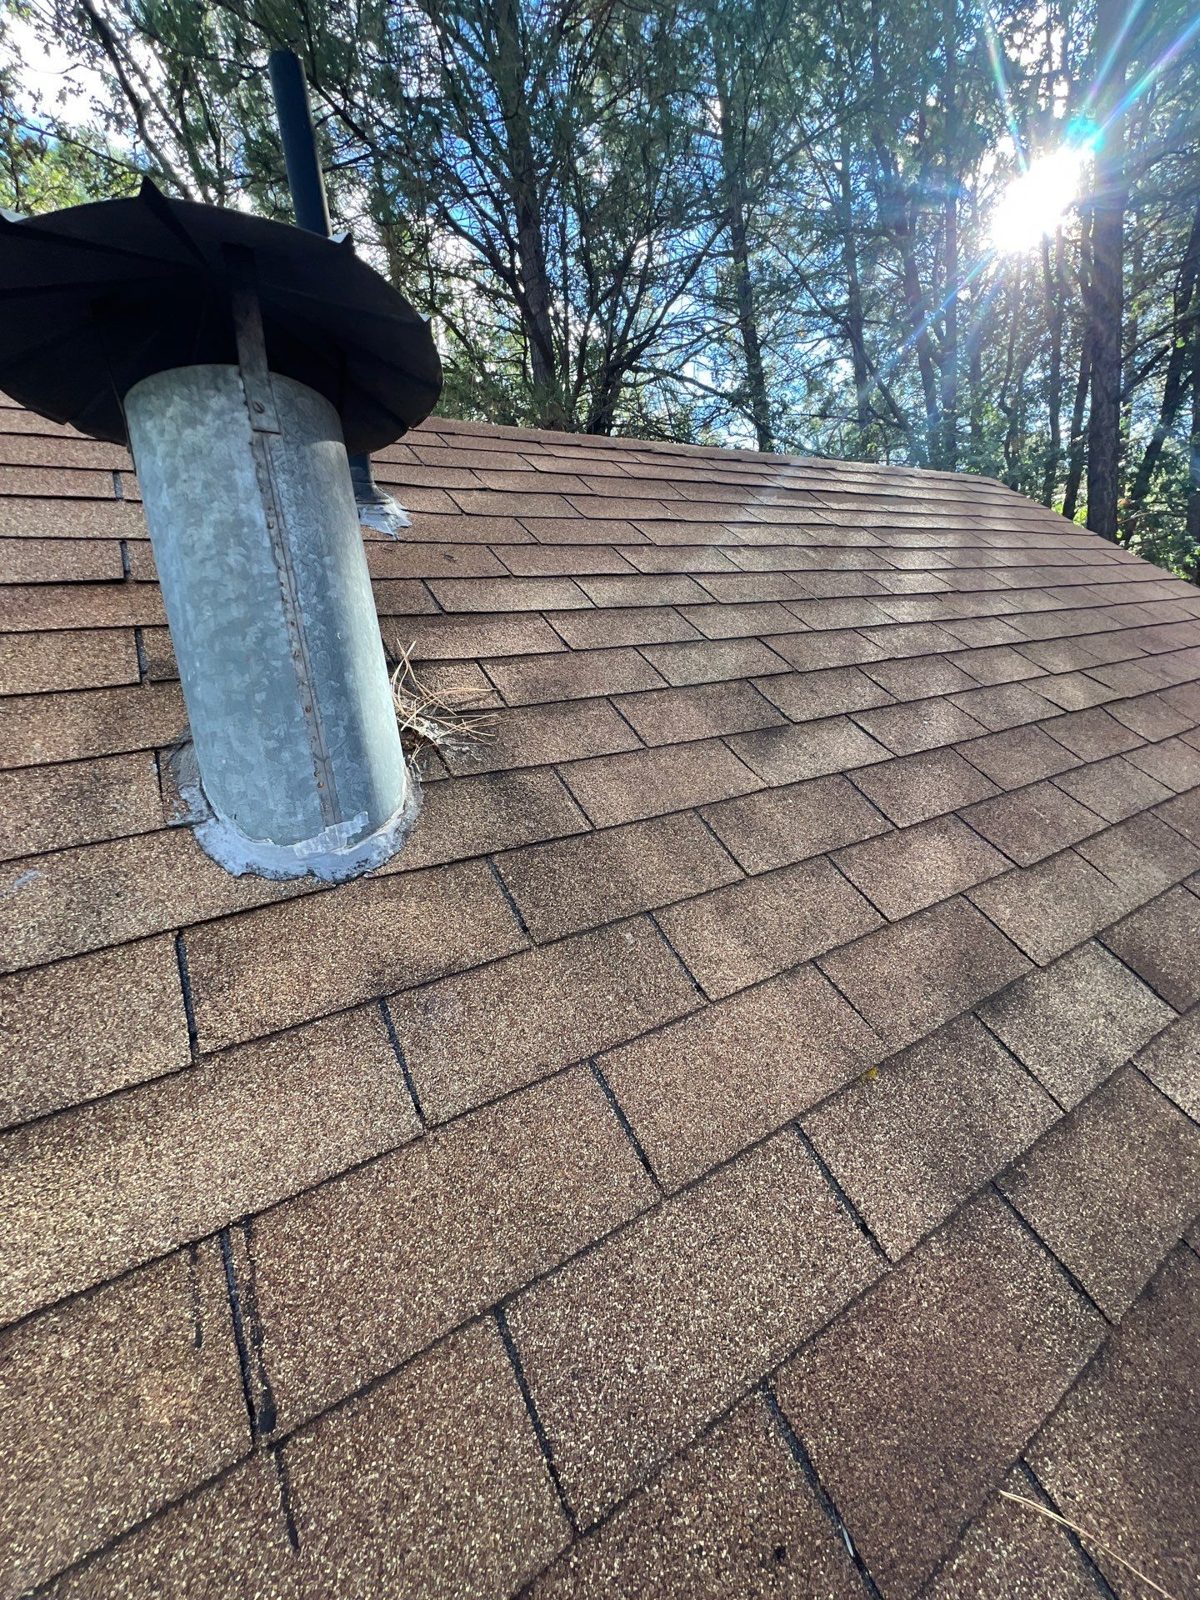
The rubber collar around plumbing vent stacks, commonly called a pipe boot, is usually EPDM rubber. It’s the shortest-lived flashing component on your roof, typically lasting 10 to 15 years compared to decades for metal flashing. Cracked or split rubber around a pipe is easy to spot from a ladder and is a reasonable, low-risk DIY swap for a handy homeowner.
Kickout flashing: the piece everyone forgets
Kickout flashing sits at the bottom of a step flashing run, exactly where a roof edge meets a sidewall, and its job is to kick water outward into the gutter instead of letting it run behind the siding. It is often missing on older homes, and its absence is a common cause of hidden wall rot.
Headwall and apron flashing: protecting horizontal transitions
Apron and headwall flashing sit above windows and doors, or wherever a roof plane runs into a wall from below. Correct installation gives the flashing a positive slope away from the wall, and cladding should never rest directly on top of it, doing so can bend the flashing back toward the wall and defeat its purpose.
| Flashing type | Typical location | Purpose | Common materials | Durability/lifespan |
|---|---|---|---|---|
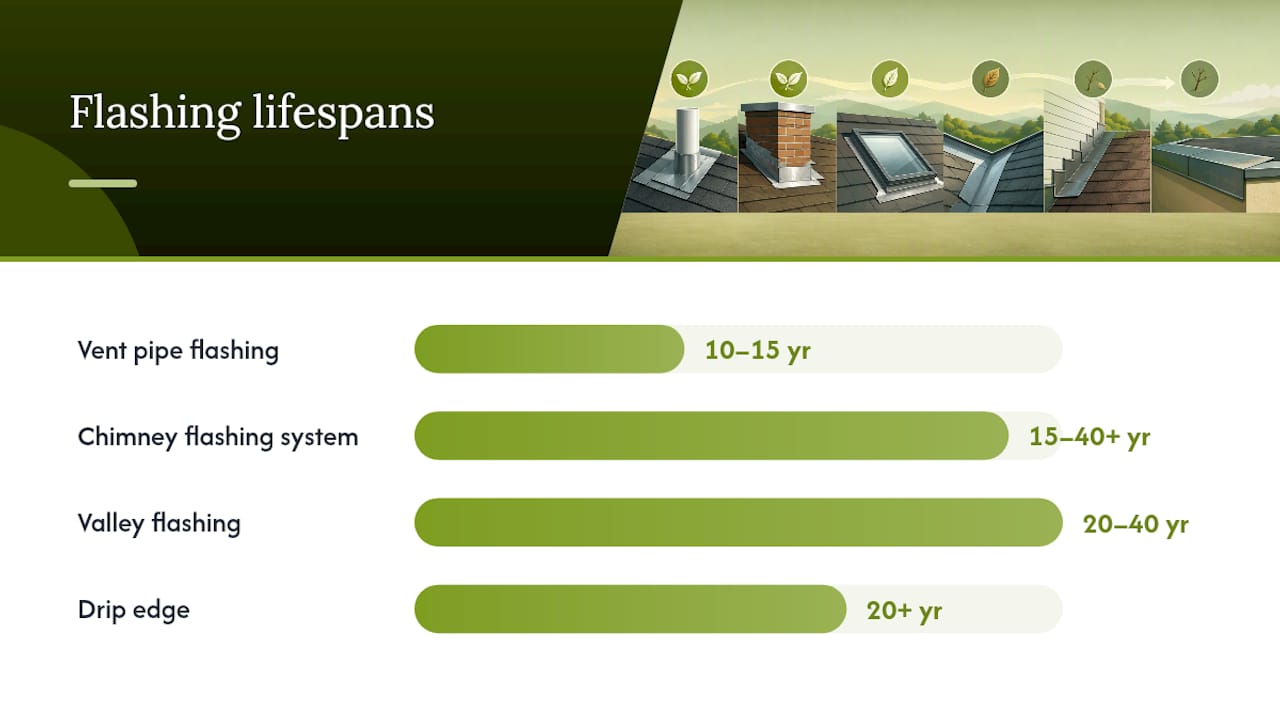
| Drip edge | Eaves and rakes | Directs water off the roof edge, away from fascia | Galvanized steel, aluminum | 20+ years, outlasts shingles |
| Valley flashing | Where two roof planes meet | Channels concentrated runoff | Galvanized steel, aluminum, copper | 20 to 40 years depending on metal |
| Step flashing | Roof-to-sidewall junctions | Layers water down and out at walls | Galvanized steel, aluminum | Matches roof lifespan if installed correctly |
| Counter flashing | Paired with step/chimney flashing | Caps and seals the step flashing seam | Galvanized steel, copper | 20+ years reglet-mounted; less if surface-mounted |
| Chimney flashing system | Chimney base and sides | Diverts water around masonry | Copper, galvanized steel | Varies by component, 15 to 40+ years |
| Vent pipe flashing | Plumbing stacks | Seals around round penetrations | EPDM rubber | 10 to 15 years |
| Kickout flashing | Roof edge meets sidewall | Diverts water into gutter, away from siding | Galvanized steel, aluminum | 20+ years |
| Headwall/apron flashing | Above windows, doors, low walls | Sheds water away from openings | Galvanized steel, aluminum | 20+ years |
Which Flashing Materials Last the Longest?
Copper and stainless steel are the most durable and corrosion-resistant flashing materials, while galvanized steel, aluminum, and EPDM rubber boots offer solid performance at a lower upfront cost. The tradeoff is straightforward: pay more up front for metals that can outlast the roof itself, or choose budget materials that need replacement on a shorter cycle.
| Material | Pros | Cons | Estimated lifespan |
|---|---|---|---|
| Copper | Excellent corrosion resistance, ages well | High cost, can stain adjacent surfaces | 50+ years |
| Stainless steel | Very durable, low maintenance | Higher cost than galvanized | Several decades |
| Galvanized steel (26 ga) | Affordable, widely available | Can rust once coating wears | 20 to 30 years |
| Aluminum (0.025") | Lightweight, corrosion-resistant | Can corrode near coastal salt air | 20 to 30 years |
| EPDM rubber (pipe boots) | Flexible, inexpensive, easy to replace | UV degradation cracks rubber over time | 10 to 15 years |
A few practical notes worth keeping in mind:
- Mixing incompatible metals, aluminum flashing against copper gutters, for instance, causes galvanic corrosion that eats away the less noble metal over time.
- Match your flashing metal to your gutter material where the two touch to avoid this reaction entirely.
- Coastal homes benefit from stainless steel or aluminum over plain galvanized, since salt air accelerates rust.
- Snow-heavy climates favor metal valley flashing over rubber components, since ice and sustained moisture exposure shorten rubber’s life faster.
How to Spot Flashing Problems
Visible corrosion, separated counter flashing, a missing kickout at a sidewall, a cracked pipe boot, or an active interior leak near a wall or chimney are the clearest signs something needs attention now. Most of these you can catch from the ground with binoculars or from a stable ladder, without climbing onto the roof itself.
Inspection checklist:
- Look for rust streaks or white corrosion trails below any metal flashing
- Check for gaps between counter flashing and the wall or chimney
- Confirm a kickout piece exists wherever a roof edge dead-ends into a sidewall
- Inspect pipe boots for cracking, splitting, or UV-brittled rubber
- Watch ceilings and walls near chimneys and dormers for staining after storms
Pro Tip: A bead of fresh sealant over an old flashing joint is a temporary patch, not a fix. Sealant degrades in UV and temperature swings within a year or two, while proper mechanical lapping doesn’t rely on it at all.
Minor pipe boot swaps and small drip edge nail pops are reasonable DIY jobs. Chimney systems, reglet-cut counter flashing, and any multi-layer failure where you can’t see the full extent of damage belong to a licensed roofer.
Getting Roof Flashing Installation Right
The core installation rule is simple: every layer goes down and out, so water always sheds toward the exterior and never gets trapped behind cladding or under shingles. Step flashing and counter flashing work as a pair precisely because of this principle, one layers with the shingles, the other caps it from above.
Finished flashing edges should be hemmed, and every lap joint needs proper overlap and sealing, following what building scientists call the fundamental “down and out” rule for site-built flashing.
Correct installation order:
- Drip edge goes on first, along eaves and rakes
- Underlayment follows, overlapping the drip edge correctly
- Ice and water shield goes in vulnerable zones like valleys and eaves
- Valley metal installs before the surrounding shingles
- Step flashing goes in with each shingle course at walls
- Counter flashing installs last, capping everything beneath it
When you’re getting quotes, ask directly whether kickout flashing is included at every roof-to-sidewall termination. IRC R903.2 requires it, and it’s one of the cheapest details to add during installation, and one of the most expensive to retrofit later.
Maintenance That Actually Extends Flashing Life
Regular gutter cleaning, visual checks of exposed flashing, replacing worn pipe boots before they crack fully through, and watching for failed sealant joints will cut your flashing-related leak risk substantially. None of this requires special tools, just a ladder, a flashlight, and a seasonal habit.
Priority order for seasonal checks:
- Clean gutters so water doesn’t back up under drip edge and eave flashing
- Scan visible metal for rust, gaps, or lifted edges
- Confirm kickout flashing is still seated correctly at sidewalls
- Trim back tree limbs and vegetation that trap moisture against flashing
Pro Tip: Walk the exterior after any major hailstorm or windstorm and photograph anything that looks disturbed. Documented, dated photos make insurance claims far smoother if a flashing failure later turns into a bigger leak.
When to Call a Professional Roofer
Call a licensed roofer for chimney flashing systems, any reglet-cut counter flashing work, extensive corrosion, active interior leaks, or visible movement between the roof and wall framing. These jobs involve multiple layered components where a mistake on one piece undermines the whole assembly.
A thorough professional inspection covers:
- All flashing types present on the roof, not just the obvious ones
- Reglet cuts and counter flashing seating in masonry
- Kickout flashing at every sidewall termination
- Valley condition and metal integrity
- Pipe boot condition and remaining service life
- Skylight seal integrity
- The gutter-to-drip-edge interface
A written scope of work should name every flashing component being replaced or repaired, not just “flashing as needed.” Vague scopes are how corners get cut on the pieces homeowners can’t easily see once the job is done.
Slade Roofing backs residential and commercial flashing and roofing work with a 25-year leak warranty and a 50-year product warranty, and homeowners should feel comfortable asking any contractor to put comparable terms in writing.
What Most Homeowners Get Wrong About Flashing
The mistake I see most often isn’t bad metal, it’s bad overlaps. Homeowners assume a leak means the flashing failed, when usually a piece was lapped wrong, a kickout was skipped, or someone relied on caulk instead of a mechanical seam… If you take one thing from this guide, walk your roofline twice a year and look for gaps at every wall and chimney junction before you ever reach for a tube of sealant.
Get Flashing Problems Fixed Before They Become Claims
Professional help solves the flashing problems a homeowner can’t safely diagnose alone, complex chimney systems, hidden step flashing under siding, and damage that’s already spread beneath shingles you can’t see from the ground. Sladeroof handles the full range: inspections that catch flashing issues before they become leaks, emergency repairs when a storm exposes a weak point, reglet-cut counter flashing on masonry chimneys, and full flashing replacement tied into a new roof system.

Slade Roofing’s services relevant to flashing repair and replacement include:
- Roof inspections that specifically check flashing, kickouts, valleys, and pipe boots
- Emergency repairs for active leaks at wall and chimney transitions
- Full flashing system replacement during reroofing
- Insurance claim assistance when storm damage caused the failure
Every flashing job comes backed by a 25-year leak warranty and a 50-year product warranty, so the work is protected long after the crew leaves. If you’ve spotted rust, a gap, or a leak near a chimney or sidewall, get a residential roofing inspection scheduled before the next storm finds that weak point for you.
Frequently Asked Questions
What is the difference between step flashing and counter flashing? Step flashing is installed with each shingle course at a roof-to-wall junction, while counter flashing caps it from above, mounted into the wall itself, to fully seal the seam against water intrusion.
What is the most common type of roof flashing? Drip edge and step flashing are the two most widespread types on a typical asphalt shingle roof, since nearly every roof has eaves and at least one wall intersection.
How long does roof flashing last? Metal flashing like galvanized steel or aluminum often lasts 20 to 30 years and can outlast the shingles around it, while EPDM rubber pipe boots typically need replacement after 10 to 15 years.
Can I repair roof flashing myself? Simple fixes like a loose drip edge nail or a cracked pipe boot are reasonable DIY jobs. Chimney flashing, reglet-cut counter flashing, and any leak you can’t fully trace should go to a licensed roofer.
Is kickout flashing required by code? Yes. Building code requires kickout flashing wherever a roof edge terminates at a sidewall, specifically to prevent water from running behind the siding, though many older homes were built before this requirement was enforced.
Sources
- BSC Information Sheet 303: Common flashing
- What Is Flashing on a Roof? 8 Types Explained | TRB
- Understanding roof flashing: essential protection for every home | GAF
- What Is Roof Flashing? | This Old House
Recommended
Ready for a real answer on your roof?
Slade Roofing pairs licensed insurance agents with licensed roofers. Get your free inspection in about 30 seconds.
Get My Free Inspection →