
Storm Damage Roof Inspection: What Homeowners Must Do
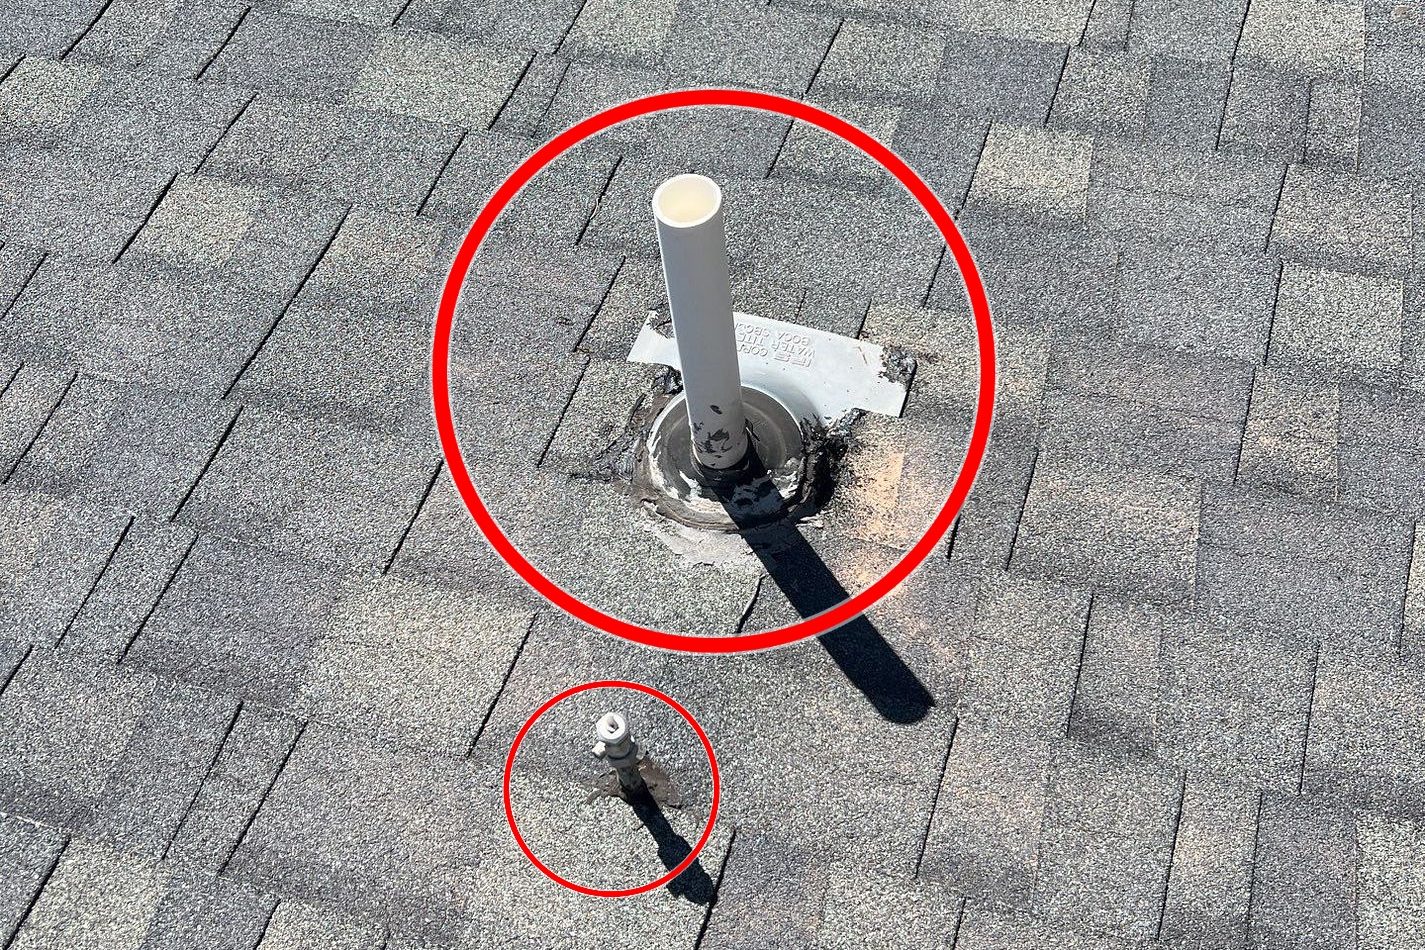
After a storm, do three things immediately: confirm it’s safe to be outside, document every piece of visible damage from the ground, and contact your insurer or a licensed roofer. Don’t wait for a leak to appear. Many of the costliest roof failures after storms start as small, invisible breaches that worsen over days.
Here’s what to do in the first 24 hours, before you call anyone:
- Stay off the roof. Wet shingles, hidden structural damage, and debris make climbing dangerous. Ground-level and attic checks give you most of what you need.
- Walk the perimeter. Look for missing shingles, granules in gutters, dented gutters, and debris on the ground. Bring your phone and photograph everything.
- Check the attic. Grab a flashlight and look for daylight through the deck, wet insulation, or dark staining on the sheathing.
- Note the date and time. Pull a local weather report or radar screenshot for the storm. Insurers want proof the damage is storm-related, not pre-existing.
- Call your insurer. Report the event and ask about your policy’s claim window. Some carriers have storm-specific deadlines.
- Don’t start permanent repairs yet. Temporary tarping is fine and encouraged. Permanent fixes before documentation can void parts of your claim.
Pro Tip: Photograph your gutters and downspout outlets first. Granule buildup there is one of the clearest early signs of shingle damage and one of the easiest things to capture before rain washes it away.
According to the Owens Corning storm damage checklist, a fast, documented survey of the exterior, attic, and adjacent property is standard insurer and industry advice. The sooner you do it, the stronger your claim.
Table of Contents
- When should you inspect your roof after a storm?
- What storm damage actually looks like on your roof
- How wind, hail, rain, and debris each damage your roof differently
- How to document roof damage for an insurance claim
- What inspections cost and how long you have to file a claim
- When to hire a licensed roofer and what their report should include
- Key Takeaways
- The part most homeowners get wrong
- Sladeroof handles inspections, claims, and repairs in one place
- Useful sources for homeowners who want to go deeper
When should you inspect your roof after a storm?
The short answer: within a few days when it’s safe to do so. Waiting longer doesn’t just risk further water intrusion. It also gives insurers reason to question whether damage is storm-related or the result of deferred maintenance.
That said, timing depends on conditions. If the storm brought high winds, large hail, or nearby tree falls, a professional inspection should happen before you do anything beyond a ground-level walk.
Fast-track a professional inspection when you see:
- Active leaks or water stains appearing inside the home
- Missing shingles across more than one slope
- Hail larger than a quarter
- Fallen limbs or debris on the roof
- Any sign of structural sagging or movement
Wait for a pro before going up yourself when:
- Your roof pitch is steeper than 6/12 (a noticeable slope when you look at it)
- There’s still standing water, ice, or wet debris on the surface
- You suspect structural damage from impact or uplift
- You have no ladder safety experience
Pro Tip: Use a tool like MyHailScore to pull address-level hail history from NOAA radar data. If your area recorded 1-inch or larger hail, schedule a professional inspection even if your initial ground check looks clean.
What storm damage actually looks like on your roof
Knowing what to look for changes everything; for a detailed explanation of collateral damage indicators and common storm damage types, see Types of Storm Roof Damage: A Homeowner’s Guide. Most homeowners miss subtle damage because they don’t know what “damaged” looks like on their specific roof material. American Family Insurance’s inspection guidance confirms that ground-level and attic checks uncover the majority of common post-storm issues.
Ground-level signs
- Granules collecting in gutters or at downspout outlets (asphalt shingles)
- Dented or bent gutters and downspouts
- Dented aluminum window screens or AC condenser fins
- Shingle fragments or pieces of flashing on the ground
- Dents on vehicles parked nearby (a strong indicator of hail size)
Roof-surface signs
- Missing, lifted, or curled shingles
- Exposed underlayment or bare wood deck
- Circular bruises or soft spots on asphalt shingles (press gently with a thumb)
- Cracked or broken clay or concrete tiles
- Dents in metal panels or ridge caps
- Damaged or displaced flashing around chimneys, vents, and skylights
Attic indicators
Go up with a flashlight during daylight. Turn off the attic light and look for pinpoints of daylight coming through the deck boards. That’s the daylight-through-deck test, and it’s one of the most reliable ways to find a breach. Also check for wet or compressed insulation, dark staining on rafters or sheathing, and any sagging between joists.
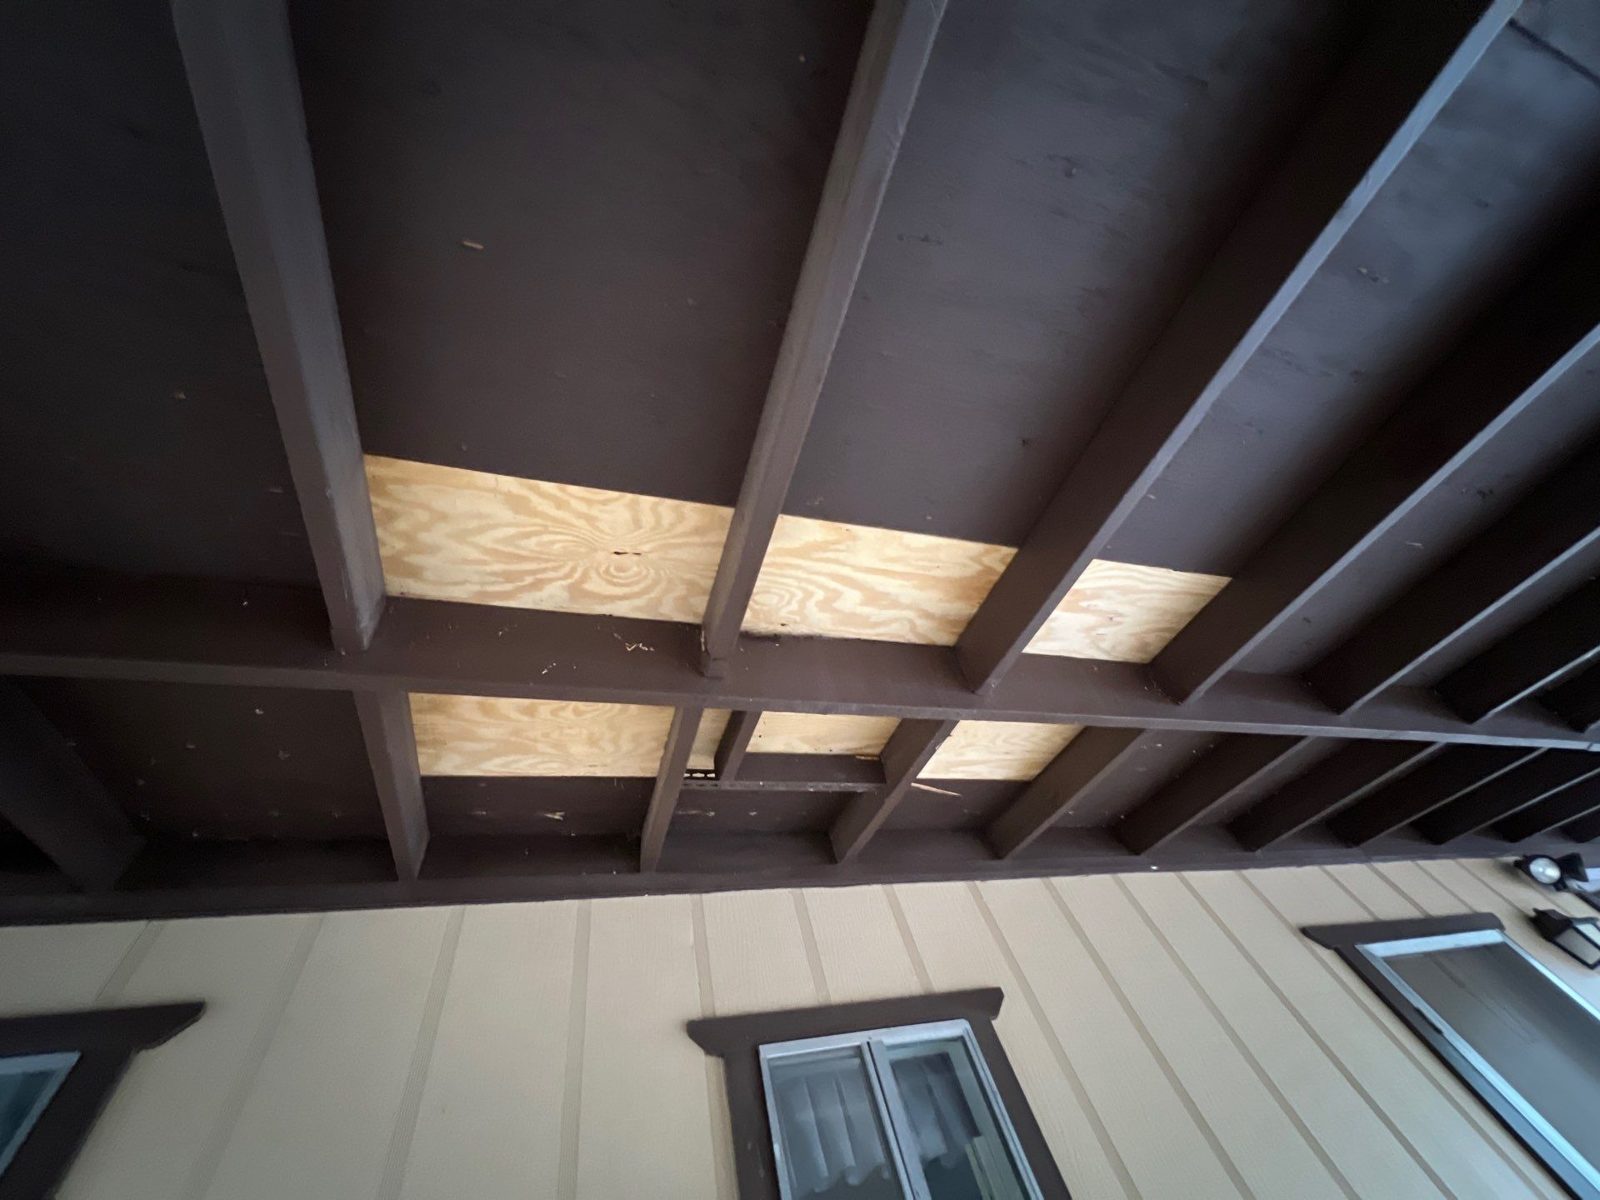
Damage by roof material
| Material | What storm damage looks like |
|---|---|
| Asphalt shingles | Circular bruises, granule loss, cracked tabs, lifted edges |
| Metal panels | Dents, punctures, displaced seams or fasteners |
| Clay/concrete tile | Cracked, chipped, or displaced tiles; broken ridge caps |
| Wood shake | Split or missing shakes, lifted edges, dark water staining |
Pro Tip: On asphalt shingles, hail bruising often feels like a soft spot under your thumb, similar to a bruise on an apple. If you can safely reach a low eave edge, that test takes seconds and tells you a lot.
GAF’s storm damage guide notes that different storm forces leave distinct damage patterns, and the roof material determines what those signs look like.
How wind, hail, rain, and debris each damage your roof differently
Understanding the failure mode matters because it changes what you prioritize in a repair conversation and what your insurer looks for.
Wind works through uplift and creasing. It gets under shingle edges, breaks the adhesive seal, and lifts tabs. A shingle that looks intact from the ground may be functionally broken at its seal line, leaving the deck exposed to water. Wind damage tends to follow a directional pattern across the roof, concentrated on the windward slope and ridge.
Hail is more random. Travelers Insurance describes hail damage as random circular impacts with granule loss or a bruised, soft feel on asphalt shingles, which adjusters distinguish from the directional wear patterns of normal aging. The Nebraska Department of Insurance notes that hail around 1.25 inches often causes measurable damage to heavy composite shingles, while 1-inch hail may affect lighter shingles and will almost certainly dent soft metals like gutters and AC fins first.
- Hail bruising: granule loss, exposed mat, soft spot under pressure
- Hail cracking: split tab or tile, usually from larger stones
- Punctures: rare on shingles, more common on metal or skylights
Heavy rain doesn’t usually damage shingles directly, but it finds every weakness. Soaked underlayment, water infiltration around flashing, and deck rot can develop within days of a breach. Watch for interior staining on ceilings or walls in the days after a storm, even if the roof looked fine initially.
Falling debris (limbs, branches, airborne objects) tends to cause localized but deep damage: broken tiles, punctures near valleys or penetrations, and displaced flashing. These are often the easiest to spot but also the most likely to create immediate leaks.
Hail size and wind speed together predict damage severity better than either factor alone. A 1-inch hailstone in a 60 mph wind hits with significantly more force than the same stone in calm air. When both factors were extreme, expect damage even on newer roofs.
How to document roof damage for an insurance claim
Good documentation is the difference between a smooth claim and a drawn-out dispute. HailMate’s roofing inspection checklist notes that insurers increasingly require close-up images per slope, geotagging, timestamps, and sometimes before/after comparisons. Start before you touch anything.
Photo checklist
- Wide-angle shots of each roof slope (all four sides if possible)
- Close-ups of every damaged area: bruised shingles, missing tabs, cracked tiles, lifted flashing
- Interior shots of any leaks, staining, or wet insulation in the attic
- Ground-level shots of dented gutters, AC fins, window screens, and any debris
- Photos of your vehicle if it was parked outside during the storm (dents confirm hail size)
Pro Tip: Don’t edit or crop photos before submitting them to your insurer. Original files carry metadata (GPS coordinates, timestamp, device info) that supports your claim. Some carriers explicitly check for this.
Collateral damage trail
Dented AC condenser tops, torn window screens, and dented gutters are what industry experts call “collateral damage indicators.” They confirm that hail of a certain size reached your property, even when the roof damage is subtle or not yet visible from the ground. Document all of it.
Recordkeeping
Keep a single folder, physical or digital, that contains: the storm date and time, a local weather report or radar screenshot, your photo set with original metadata, any contractor inspection reports, receipts for temporary repairs, and your insurer’s claim number. Adjusters work faster when everything is organized and timestamped.
For a deeper walkthrough on building a claim-ready photo package, the Sladeroof documentation guide covers what carriers actually want to see.
What inspections cost and how long you have to file a claim
Professional roof inspections after a storm are often offered at no charge by licensed contractors, including Sladeroof, as part of the estimate process. If you hire an independent inspector, expect to pay in the range of $150–$400 depending on roof size and complexity, though prices vary by region and contractor.
Repair costs depend entirely on damage scope. A few missing shingles might run a few hundred dollars. A full replacement on a mid-size home can reach several thousand dollars or more, depending on material, pitch, and local labor rates. Storm damage’s long-term effect on roof lifespan is worth factoring in: a roof that takes repeated hits without repair degrades faster than the warranty assumes.
Some insurers apply a threshold where, if a significant portion of a roof slope is damaged, they require full replacement of that slope rather than patching. This varies by carrier and policy. It’s worth asking your adjuster directly how your policy handles partial damage.
| Scenario | Typical guidance |
|---|---|
| Minor damage (a few shingles) | Repair likely; weigh repair cost against deductible |
| Moderate damage (one slope) | May trigger 25% rule; get a written scope from a licensed roofer |
| Extensive damage (multiple slopes) | Full replacement likely; file claim promptly |
| Older roof | Insurer may apply depreciation; ask about ACV vs. RCV coverage |
Claim timing
- Most policies require you to report storm damage “promptly” or within a specific window, often 1–2 years, but check your policy.
- Some states have storm-specific provisions or separate wind/hail deductibles.
- File before making permanent repairs. Temporary measures (tarping, buckets) are fine and should be documented.
Weigh the deductible. If your deductible is $2,500 and the repair estimate is $1,800, filing a claim may not make financial sense. A licensed roofer can give you a written estimate before you decide.
When to hire a licensed roofer and what their report should include
Some damage you can document yourself. Structural concerns, extensive hail patterns, and anything involving the deck or underlayment require a professional.
Call a licensed roofer when:
- You found daylight through the deck or wet insulation in the attic
- Multiple shingles are missing or lifted across more than one slope
- You suspect hail larger than a quarter struck the roof
- Your insurer’s adjuster is scheduled and you want an independent report first
- You’re unsure whether damage is storm-related or pre-existing
What a good inspection report includes:
- Annotated photos with close-ups of each damaged area, labeled by slope
- Test squares: a licensed inspector marks 10’×10’ areas on each slope and counts hail strikes within them. InterNACHI’s hail inspection methodology explains how adjusters use these strike counts to determine whether damage is “functional” and warrants replacement. The written count is central evidence for your claim.
- A clear scope of work: what needs repair, what needs replacement, and why
- A written estimate with line-item pricing
Red flags when vetting contractors:
- No license or proof of insurance (verify both before signing anything)
- Pressure to sign immediately or offers to waive your deductible (illegal in most states)
- Requests for large upfront cash payments
- Contractors who appear only after storms and can’t provide local references
If you encounter high-pressure tactics or suspect fraud, report it to the FTC and your state’s Department of Insurance. For guidance on finding a trustworthy contractor, the Sladeroof roofer vetting guide covers what credentials and questions actually matter.
Pro Tip: Ask any contractor whether they’ll attend the adjuster meeting with you. A roofer who shows up with their own annotated report and test-square documentation carries significant weight in a disputed claim.
Sladeroof’s insurance claim assistance service includes coordinated adjuster meetings and written inspection reports, which is exactly what a contested claim needs.
Key Takeaways
A storm damage roof inspection done within 24–72 hours, starting from the ground and attic, with thorough photo documentation, gives you a strong foundation for repairs and insurance claims.
| Point | Details |
|---|---|
| Inspect within 72 hours | Document from the ground and attic before weather or time degrades the evidence. |
| Collateral damage confirms hail | Dented AC fins, gutters, and window screens indicate hail severity even when roof damage is subtle. |
| Test squares matter for claims | A licensed inspector’s 10’×10’ strike count is the central evidence adjusters use for replacement decisions. |
| Photo metadata strengthens claims | Keep original files with geotags and timestamps; some insurers require this for claim approval. |
| Sladeroof covers the full process | Sladeroof provides free inspections, written reports, and adjuster coordination for Idaho, Arizona, and Wyoming homeowners. |
The part most homeowners get wrong
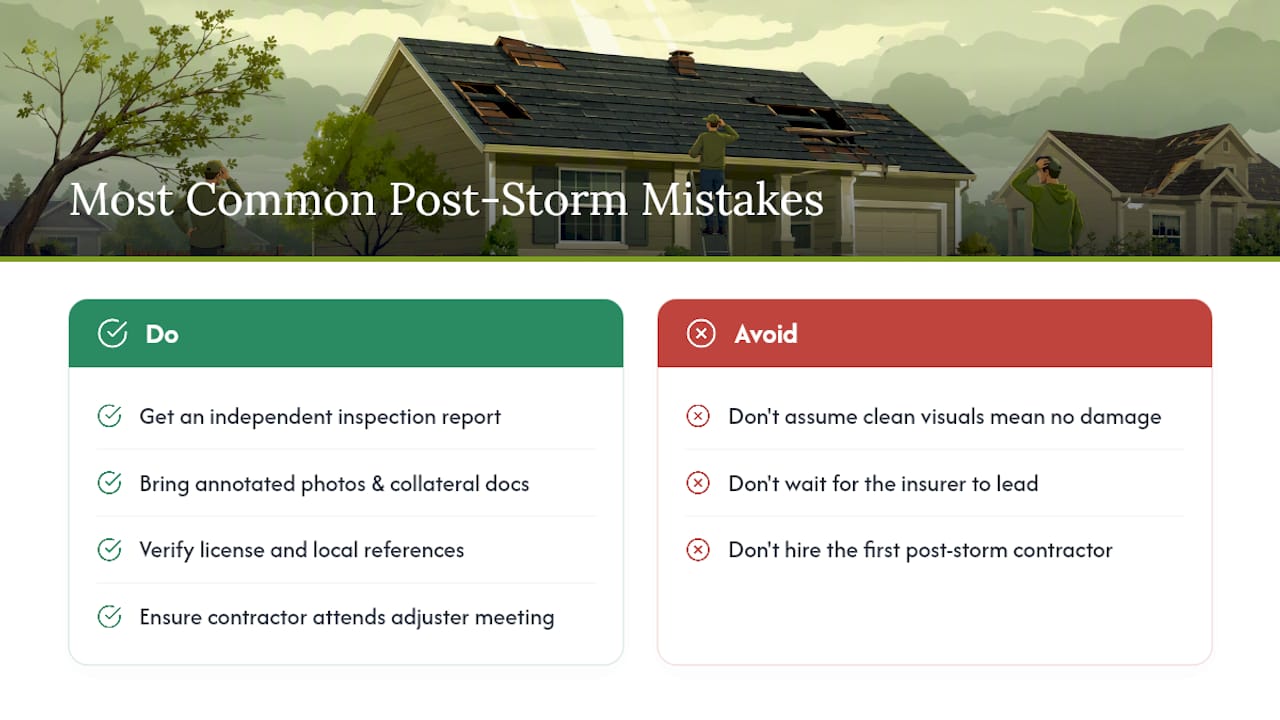
The biggest mistake I see after a storm isn’t skipping the inspection. It’s doing the inspection without understanding what you’re actually looking for, then assuming a clean visual means no damage.
Hail bruising on asphalt shingles is almost invisible from the ground and even from a ladder if you don’t know what a soft spot feels like. Wind damage at the seal line looks like an intact shingle until the next rain proves otherwise. The roof can look fine for weeks before the ceiling stain appears, and by then the deck may already be compromised.
The second mistake is waiting on the insurer to drive the process. Your adjuster is working multiple claims. They’re not going to push for a thorough test-square analysis unless a contractor shows up with one already done. Homeowners who arrive at the adjuster meeting with an independent inspection report, annotated photos, and collateral damage documentation get faster, more complete settlements. That’s not speculation. It’s the pattern that plays out consistently in storm-heavy markets like Idaho and Arizona, where Sladeroof operates.
The third mistake is hiring the first contractor who knocks on the door after a storm. Storm chasers are real, they’re aggressive, and some of them disappear after taking a deposit. Verify the license, check local references, and make sure the contractor will be there for the adjuster meeting. A roofer who won’t attend that meeting is telling you something.
Sladeroof’s 20-plus years of combined roofing and insurance experience exist precisely because these two things, the physical inspection and the claims process, have to work together. A great inspection report that doesn’t translate into a clear adjuster conversation is only half the job.
Sladeroof handles inspections, claims, and repairs in one place
After a major storm, the last thing you need is to coordinate between a roofer, an adjuster, and a documentation service separately. Sladeroof handles all three.

For homeowners in Idaho, Arizona, and Wyoming, Sladeroof offers free post-storm roof inspections with a written report, annotated photos, and test-square documentation ready for your adjuster. The team attends adjuster meetings directly, which consistently produces faster and more complete claim outcomes than homeowners navigating the process alone.
Sladeroof installs impact-resistant materials backed by long-term warranties, so the roof that goes on after a storm claim is built to handle the next one. Whether you need an emergency tarp today or a full residential roof replacement after a claim settles, the process starts with one call.
Schedule your free inspection at sladeroof.com or go directly to the insurance claim assistance page to get started.
Useful sources for homeowners who want to go deeper
These resources are worth bookmarking, especially if you’re heading into a claim or want to verify what a contractor tells you.
- How to check your roof for storm damage | American Family Insurance
- Understanding roof storm damage, how to inspect and next steps | GAF
- Mastering Roof Inspections: Hail Damage, Part 12 — InterNACHI®
- How to check your roof for hail damage | HailScore
- Roofing inspection checklist | HailMate
- Hail Damage: Does My Roof Need Repair? | Nebraska Department of Insurance
- Roof Storm Damage Checklist | Owens Corning
- Identifying hail damage | Travelers Insurance
- ReportFraud — Federal Trade Commission
Recommended
Ready for a real answer on your roof?
Slade Roofing pairs licensed insurance agents with licensed roofers. Get your free inspection in about 30 seconds.
Get My Free Inspection →