
Temporary Roof Leak Repair: Emergency Steps for Homeowners
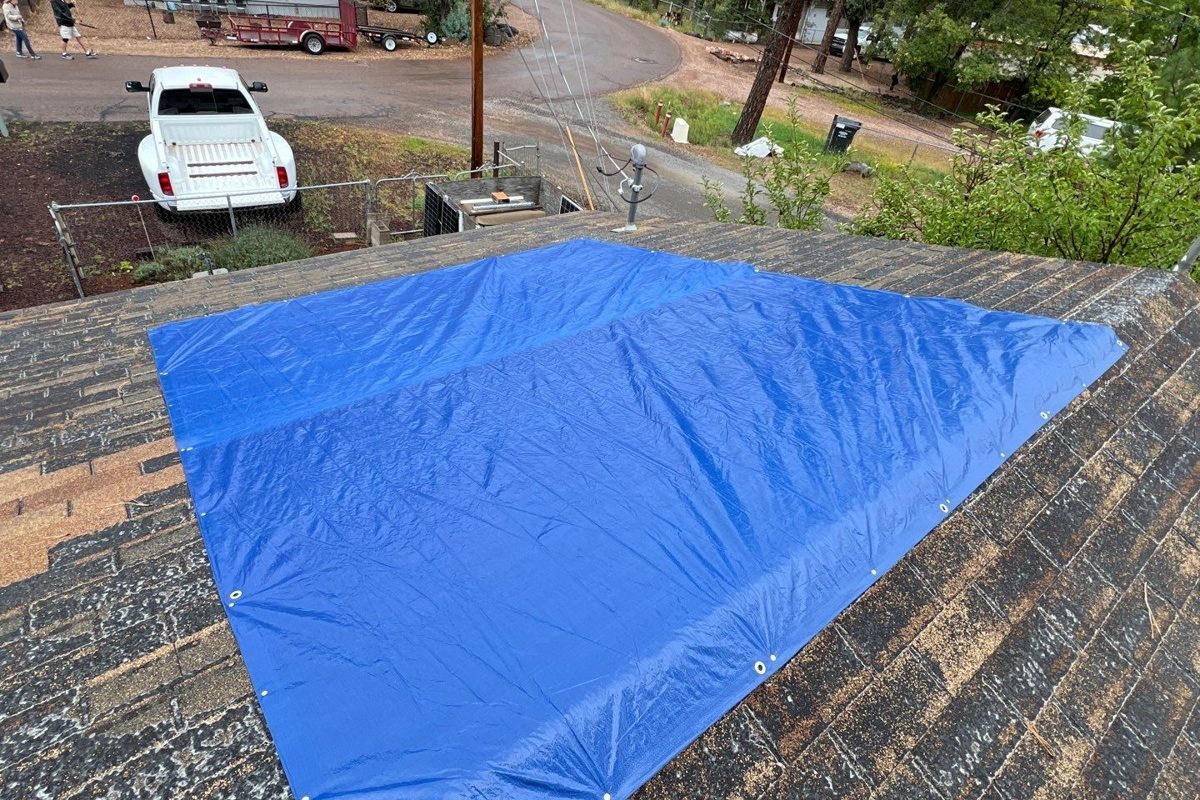
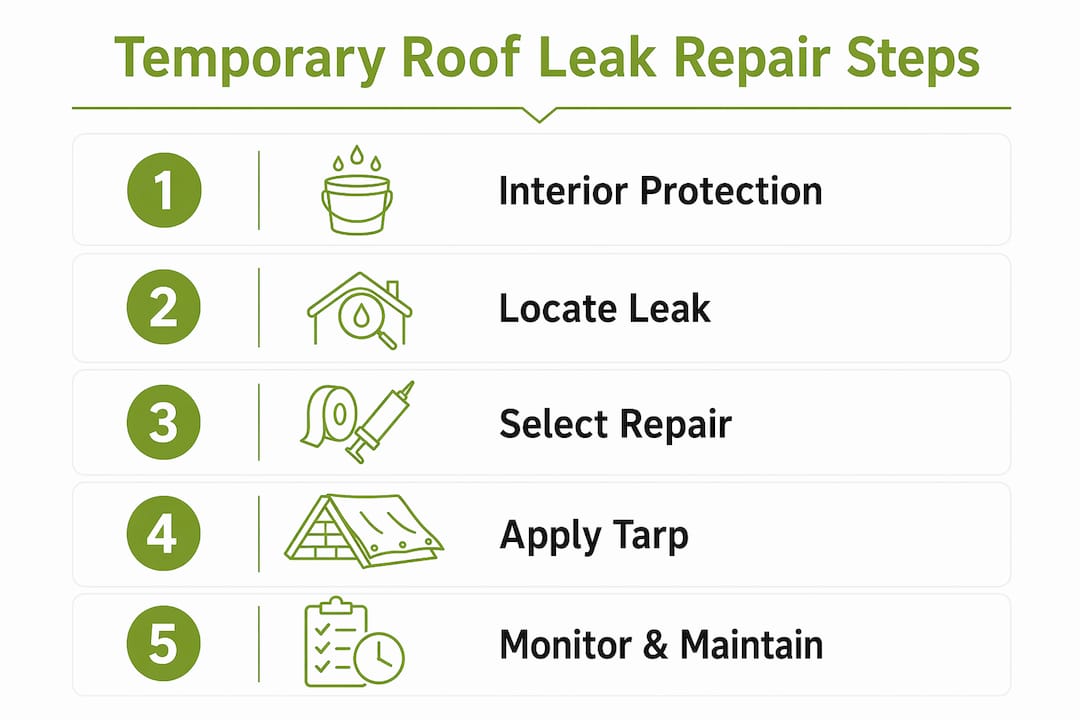
The fastest way to stop an active roof leak right now is to control the water indoors first, then secure a heavy-duty tarp over the damaged area when it is safe to go outside. Start with these three actions: catch the water with buckets, relieve any ceiling bulge by poking a small hole at its lowest point, and move valuables away from the wet zone. If water is near a light fixture or outlet, shut that circuit off at the breaker before anything else.
Right now, in order:
- Move or cover furniture and valuables with plastic sheeting
- Place buckets under active drips
- Poke a small hole in a sagging ceiling bulge to drain it in a controlled stream rather than letting it collapse
- Kill power at the breaker if water is near any electrical fixture
- If the storm has passed and the roof is safe to access, secure a tarp over the damaged area
- Stay inside and use interior diversion only if the roof is wet, icy, or the wind is still up
Interior measures are your first line of defense during an active storm. Roof access comes after the weather clears.
Table of Contents
- When is it safe to go on the roof?
- What materials do you need before you start?
- How do you do each type of temporary roof leak repair?
- Which method works best for your roof type?
- How long do temporary fixes last, and when should you call a pro?
- Key Takeaways
- Why temporary patches matter more than most homeowners realize
- Sladeroof’s emergency roof service: what to expect
- Useful sources and further reading
When is it safe to go on the roof?
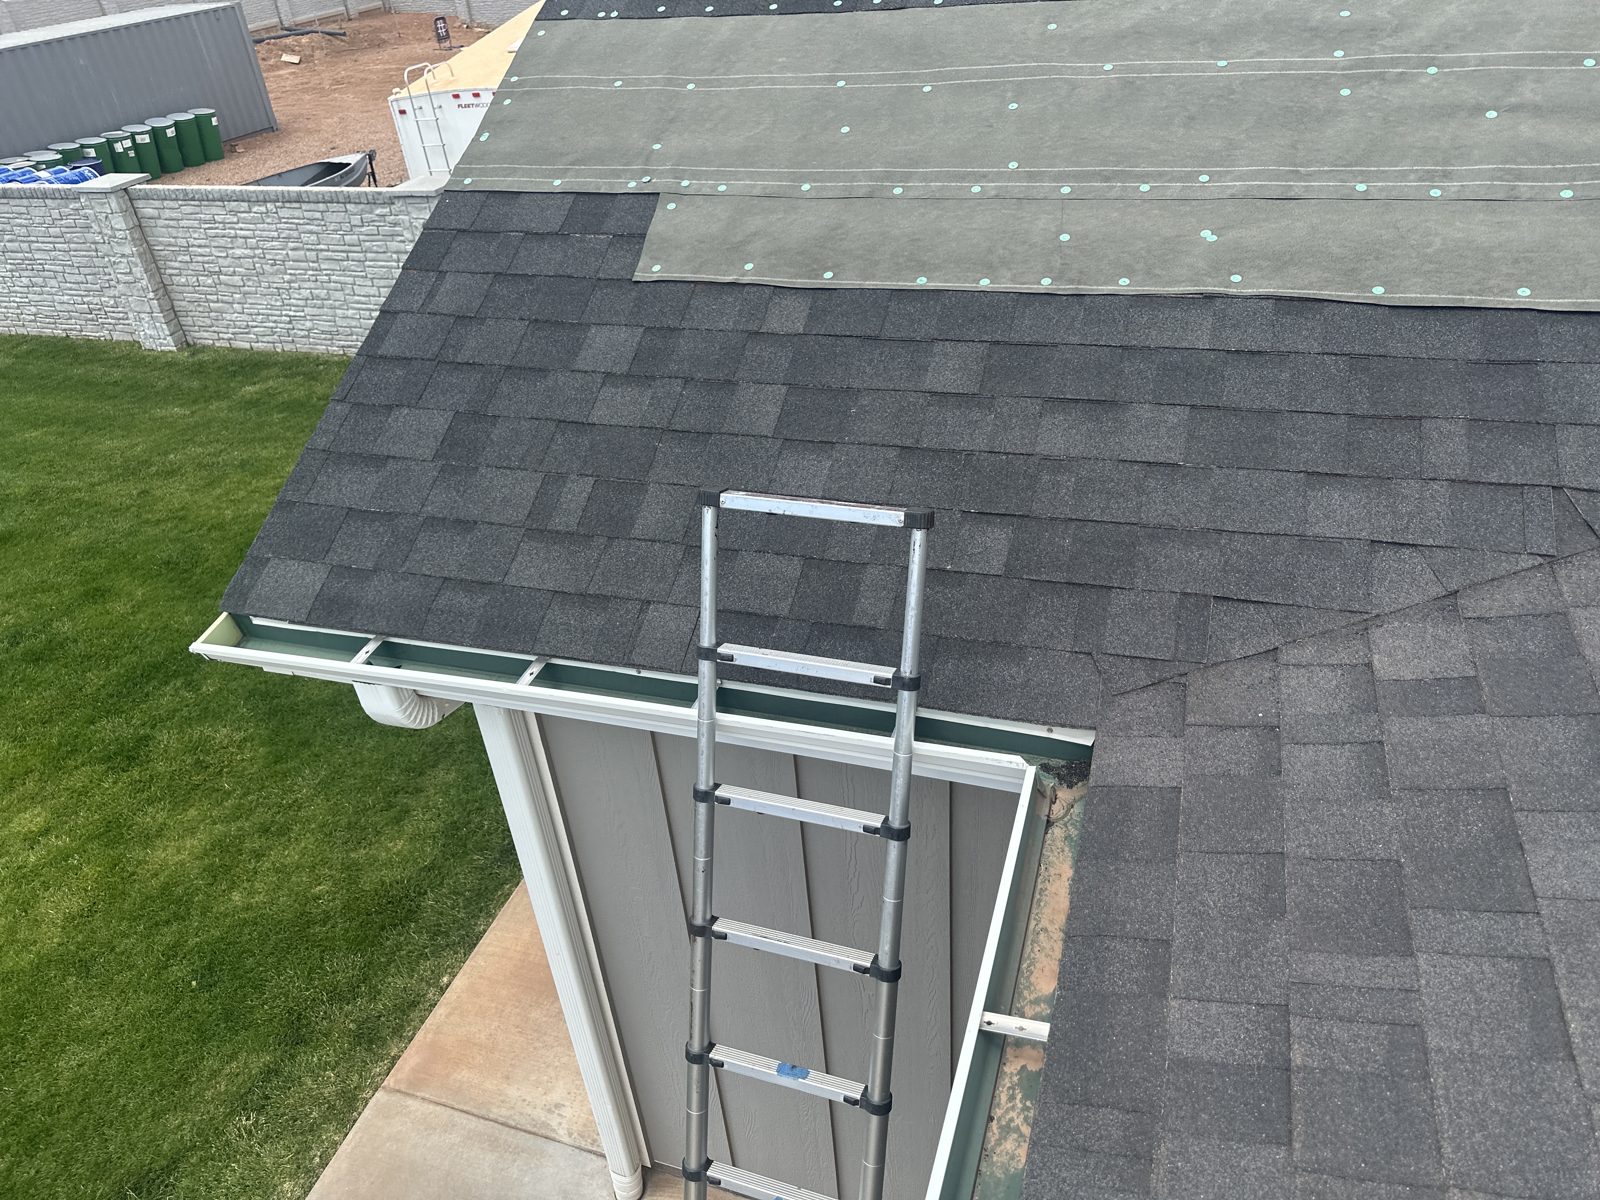
Never get on a wet, icy, or wind-swept roof. That rule is not a suggestion. A pitch that feels manageable in dry conditions becomes genuinely dangerous the moment it is damp, and a fall from a single-story roof can be fatal. The same goes for any roof with visible structural damage: sagging decking, a tree impact, or a large hole means the surface may not hold your weight.
Lightning is an absolute stop. If there is any electrical activity in the area, stay off the roof entirely and work from inside only.
For interior attic access, use a helper. One person in the attic, one person at the base of the ladder. Wear non-slip footwear, use a rated ladder positioned at the correct angle, and never carry materials up with both hands. If you smell anything burning or see scorch marks near wet areas, treat it as an electrical emergency and call 911 before anything else.
Pro Tip: Before you climb, check the attic first with a flashlight. You can often confirm the leak location from below without setting foot on the roof, which lets you position the tarp more accurately and reduces your time on the surface.
What materials do you need before you start?
Gather these before going up. A mid-storm hardware run wastes time and leaves your interior exposed longer.
Emergency kit:
- Heavy-duty polyethylene tarp, minimum 6-mil thickness, with 10–12 mil preferred for extended protection
- Two or more 2x4 boards, cut to tarp width
- 3-inch wood screws and a drill or screw gun
- Roofing cement or polyurethane sealant (tube or tub)
- Self-adhesive flashing tape (butyl-backed, 4–6 inches wide)
- EPDM rubber patch kit (for flat roofs)
- Heavy-duty plastic sheeting (6 mil) for interior diversion
- Buckets and towels
- Utility knife
- Flashlight or headlamp
- Work gloves and non-slip footwear
- Rated extension ladder
On tarp sizing: the tarp must extend at least 4 feet beyond the damaged area on every side. If the damage is near the ridge, the tarp needs to wrap over the peak by at least 3 feet. Buy larger than you think you need.
A basic DIY emergency kit costs a moderate amount at any home improvement store. A quality 10-mil tarp large enough for a typical repair zone is available for a reasonable price. That is a small number compared to what a soaked ceiling or ruined insulation costs to remediate.
How do you do each type of temporary roof leak repair?
Each method below targets a specific situation. Read through them, pick the one that matches your roof and the damage, then execute it in order.
Interior water diversion (when roof access is unsafe)
This is your go-to during an active storm. Spread 6-mil plastic sheeting across the attic floor under the leak, creating a funnel that directs water into a bucket. Tape the edges of the plastic to joists or rafters to hold the shape. Check the bucket every 30–60 minutes and empty it before it overflows. This does nothing to stop the leak at the source, but it protects your ceiling, insulation, and living space until conditions allow roof access.
Tarping the roof
Once the weather clears, tarping is the most reliable temporary fix. Locate the leak source from the attic first, then mark the area mentally before climbing. Lay the tarp over the damaged section so it extends at least 4 feet past the damage on all sides. Smooth out wrinkles, which can pool water and create new entry points.
To anchor it: wrap one end of the tarp around a 2x4, then drive 3-inch screws through the board and tarp into the roof deck at roughly 16-inch intervals. Repeat on the opposite edge. If the damage is near the ridge, wrap the tarp over the peak by at least 3 feet and secure a 2x4 at the ridge line on the far side.
Pro Tip: Never nail through the tarp field itself. Nails create holes that let water in. Anchor boards along the edges are the professional method — they keep the tarp taut and waterproof.
A properly installed tarp typically holds for 30–90 days, with heavy-duty setups approaching the upper end. That window is enough time to get a contractor scheduled and a permanent repair completed.
Roofing cement or polyurethane sealant
For small penetrations, lifted shingles, or cracked flashing, roofing cement or a polyurethane sealant can buy days to weeks. The surface must be as dry as possible. Scrape away any loose material, press the shingle or flashing back into position, and apply the sealant generously under and over the repair. Smooth it with a putty knife and press firmly. This is a stopgap, not a fix. It will fail under sustained UV exposure or freeze-thaw cycles, so treat it as a bridge to permanent repair only.
Self-adhesive flashing tape
Butyl-backed flashing tape works well on small cracks, nail holes, and seam failures. Clean the surface, let it dry as much as possible, peel the backing, and press the tape firmly from the center outward to avoid air pockets. Run a second strip overlapping the first by at least 2 inches for anything wider than a hairline crack. Check adhesion after the next rain. Like sealant, this is a short-term measure.
Rubber patch for flat or EPDM roofs
Flat roofs and EPDM membranes respond well to rubber patch kits. Clean the area with a rag and EPDM cleaner or isopropyl alcohol. Cut the patch at least 3 inches larger than the damage on all sides, round the corners (square corners peel faster), apply the adhesive, and press firmly. Weigh the patch down with a board or sandbag for at least an hour. Inspect the seam after the first rain.
Plywood patch for large holes
For a puncture or impact hole too large for tape or sealant, cut a piece of 1/2-inch or thicker plywood slightly larger than the opening. Place it flush over the hole and drive screws around the perimeter into the surrounding deck. Cover the plywood with a tarp or self-adhesive flashing until a contractor can replace the damaged section. This is structural containment, not a weatherproof seal, so the tarp layer is not optional.
Which method works best for your roof type?
Not every fix works on every roof. Using the wrong method can cause secondary damage or simply fail within hours.
Asphalt shingle roofs are the most forgiving for DIY temporary repair. Tarping works well across any slope. Roofing cement handles lifted or cracked shingles. Self-adhesive tape covers small nail holes and minor flashing failures. Avoid driving screws directly into shingles outside the anchor board method.
Metal roofs require more caution. Anchor boards can be used, but screw placement matters because metal panels can flex and crack around fasteners if overtightened. Sealants designed for metal (butyl or silicone-based) work on seam failures. Steep metal roofs are genuinely dangerous to walk on even when dry. If the pitch is steep or the panels are slick, call a professional rather than attempting roof access.
Flat and EPDM roofs are the best candidates for rubber patch kits and adhesive seam repair. A weighted tarp works as a backup when the membrane damage is too large for a patch. Avoid walking on EPDM more than necessary since foot traffic accelerates membrane wear.
- Tile roofs (clay or concrete): do not attempt DIY access. Tiles crack under foot traffic, and the underlying felt is the actual waterproof layer. Interior diversion and a professional call are the right moves.
- Complex flashing around chimneys, skylights, or dormers: these are high-failure zones that require attic inspection and often professional resealing. A temporary sealant application can help, but these areas fail in ways that are hard to diagnose without experience.
When roof access is unsafe for any reason, interior diversion is always the right default. Protecting the inside of the home is more valuable than a rushed, unsafe repair attempt.
How long do temporary fixes last, and when should you call a pro?
| Method | Typical Lifespan | Approximate DIY Cost |
|---|---|---|
| Heavy-duty tarp (10–12 mil, anchored) | 30–90 days | $30–$80 |
| Roofing cement / sealant | Days to 3 weeks | $10–$25 |
| Self-adhesive flashing tape | 1–4 weeks | $15–$40 |
| EPDM rubber patch | 2–8 weeks | $20–$50 |
| Plywood patch + tarp | Up to 30 days | $40–$100 |
| Professional emergency tarping | 30–90 days | $200–$500 |
A professional emergency visit typically runs $300–$1,500 depending on scope, time of day, and storm-surge demand. After-hours and weekend calls often run 1.5–2 times standard rates. Minor permanent repairs, like patching a leaky vent or replacing a few shingles, typically range $150–$1,000 once a contractor is on site.
Call a professional immediately if you see any of these:
- A ceiling bulge that is large, spreading, or has already collapsed
- Active heavy water flow into living space, not just drips
- Water contacting any electrical fixture, panel, or wiring
- Visible structural damage: sagging decking, a tree through the roof, or a large section of missing roofing
- Multiple simultaneous leak points, which usually signals widespread damage
Professional emergency tarping services exist precisely for situations where the damage is too large, the roof is too dangerous, or the homeowner cannot safely execute a DIY fix. There is no shame in that call. Insurers generally expect reasonable mitigation when a leak is caused by a covered peril, so document everything: photos before and after, receipts for materials, and a written note of when the leak started. That documentation supports your claim and demonstrates you acted responsibly.
Key Takeaways
A properly anchored heavy-duty tarp is the most effective temporary roof leak repair, buying several weeks of protection while you arrange a permanent fix.
| Point | Details |
|---|---|
| Protect people and power first | Shut the breaker for any circuit near water before touching anything else. |
| Tarp specs matter | Use a minimum 6-mil tarp, extend 4 ft past damage on all sides, wrap ridge by 3 ft if near the peak. |
| Anchor boards, not nails | Drive 3-inch screws through 2x4 boards along tarp edges — never nail through the tarp field. |
| Temporary fixes have a clock | Tarps last 30–90 days; sealants and tape last days to weeks. Schedule a permanent repair before the window closes. |
| Sladeroof for permanent repair | Sladeroof provides emergency tarping, inspection, and permanent repair in Idaho, Arizona, and Wyoming, backed by a 25-year leak warranty. |
Why temporary patches matter more than most homeowners realize
There is a gap between what a temporary patch does and what homeowners expect it to do. Most people treat a tarp or a tube of roofing cement as a fix. It is not. It is damage control, and that distinction shapes every decision that follows.
What a temporary patch reliably does: it slows or stops active water intrusion, protects insulation and ceiling materials from saturation, and gives you time to get a contractor on site without the pressure of an ongoing emergency. That time is genuinely valuable. A ceiling that stays dry for 60 days while you schedule a permanent repair is a ceiling you probably do not have to replace. A ceiling that soaks for two weeks while you wait costs two to three times more to remediate.
What a temporary patch does not do: it does not address the underlying failure. Lifted flashing, a cracked vent boot, or a compromised valley will continue to deteriorate under the tarp. When a contractor arrives for the permanent repair, every temporary measure comes off. The anchor boards come out, the sealant gets scraped, the patch gets removed. That is expected and correct. Professionals do not build on top of temporary fixes.
The insurance angle is worth understanding. Insurers expect you to mitigate when a covered event causes a leak. Failing to tarp or divert water after a storm can actually complicate a claim, because the insurer may argue that subsequent damage was preventable. Keep every receipt, photograph the damage before and after your temporary fix, and note the date and time the leak started. When you work with a contractor like Sladeroof, that documentation process becomes part of the service, which simplifies the insurance or warranty conversation considerably.
Sladeroof’s emergency roof service: what to expect
When a temporary fix is not enough, or when the damage is beyond safe DIY reach, Sladeroof’s emergency roofing service covers Idaho, Arizona, and Wyoming with 24/7 rapid response. The team arrives, inspects the damage, installs a professional-grade tarp or board-up, and documents everything for your insurance claim on the same visit.

What sets Sladeroof apart from a generic emergency call is the combination of roofing expertise and insurance experience. With over 20 years in both fields, the team knows exactly what adjusters look for and how to document mitigation correctly. You get a transparent quote for permanent repair on the same visit, so there are no surprises later. Sladeroof backs its permanent work with a 25-year leak warranty and a 50-year product warranty, which means the fix after the emergency is built to last.
If your roof took a hit and you need professional eyes on it fast, contact Sladeroof to schedule an emergency inspection or get a same-day response.
Useful sources and further reading
The following sources informed this guide and are worth bookmarking for homeowners and insurance adjusters who want to go deeper.
- Emergency Roof Leak Repair: What to Do Right Now — Roofs Wiki: covers interior mitigation priorities, tarp lifespan, cost ranges, and insurance documentation basics.
- How to Apply an Emergency Roof Tarp — Roofs Wiki: detailed tarp specs, anchor board technique, and ridge-wrap guidance.
- How to Tarp a Roof — Lowe’s: plywood patching steps and garden hose leak-location method.
- How to Tarp a Roof — Home Depot: common leak causes, attic inspection steps, and flashing repair guidance.
- Emergency Roof Tarp and Board-Up Services — SERVPRO: professional mitigation services for large or unsafe damage situations.
- How Much Does It Cost to Repair a Roof? — Cobex: minor repair cost ranges and scope guidance.
- Sladeroof Emergency Roofing Services — Sladeroof’s 24/7 emergency response page for Idaho, Arizona, and Wyoming homeowners.
On insurance documentation: photograph the damage before any temporary work, save all material receipts, and note the exact date and time the leak was discovered. Most homeowners insurance policies covering storm damage require reasonable mitigation, and a paper trail protects your claim. For guidance on whether your situation calls for an insurance claim or a warranty repair, Sladeroof’s insurance and warranty guidance page walks through the decision clearly.
This article provides general information for homeowners and is not a substitute for professional roofing or insurance advice. Confirm current codes, safety requirements, and coverage details with a licensed contractor or your insurance provider for your specific situation.
Recommended
Ready for a real answer on your roof?
Slade Roofing pairs licensed insurance agents with licensed roofers. Get your free inspection in about 30 seconds.
Get My Free Inspection →